I have this nice MacBook Pro (3,1) from 2007. It has Intel’s Core 2 Duo running 2.2 GHz. Unfortunately the battery is dead or electronics reponsible for charging it. It arrived fully charged and was working for like 2 hours or so. In case the battery runs our of any kind of charge and it is not recognized by the system, then the computer will not start at all. This was like a shock to me, but it’s the Apple hardware.
To start MacBook without the battery you need to:
press and hold power button for 10 seconds with power cord unplugged
without releasing power button, but with power cord plugged in, keep power button for another 10 seconds
release power button for a second
press power button one more time
computer should start
Then buy new battery or replace charging electronics.
Recently I’ve been tryout Elasticsearch 7 with Kibana and Metricbeat as well as Filebeat. I encountered some issues with indices so I dropped dashboards and visualizations and tried to load them again. I also cleared indices and patterns thru index management page. If you get error message like “could not locate that index-pattern” or something with fields being non-optimized then you should take few actions.
Please note that it was my lab Elastic installation so I do not care about deleting indices.
First you need to either stop all of your metricbeat modules sending data to the cluster or do some magic with the indices itself to prevent from auto-creating. Then delete all indices related to those two modules as well as its index patterns. Then go to Saved objects and delete all visualizations and dashboards. If you have custom things, then most probably you need to remember not to select them for deletion. If you have cleared out all of these you may go to sample machine with metricbeat node and run:
Effectively you will get a index alias and bare index pointing at each other. This is the main difference between manually creating pattern and letting metricbeat doing its things properly. Now you should have visualizations created correctly which means that also dashboads should work fine. Neither Elasticsearch 7 is working correctly nor messages are saying anything useful. Maybe version 8 brings little more in this aspect, but I thought that writing about this case might save some time for someone looking for similar issue happening on their environment.
Recently I got Lenovo ThinkPad T61 in working conditions. It has Intel Core 2 Duo T7100 @1.8 GHz, 4 GB of DDR2. At its maximum it can have up to 8 GB of RAM and C2D T9500, altough I’m not quite sure if changing CPU would be straightforward operation – it seems to be socketed, not BGA. I purchased it because of NVIDIA NVS 140M dicrete GPU onboard and unconventionally high screen resolution of 1680×1050. This comes as a benefit but makes few things difficult.
Windows 10 works just fine. But if you want to have Ubuntu on it… it will not be easy. I have tried Ubuntu 18, 20, 21, 22 and none of it worked out of the box. The only one working flawlessly was Ubuntu 16. It is however too old not to be consider as a obsolete experience. Even after upgrading from 16 do 18 and so on, there are GPU locks and freezes.
There is a out of the box distro called XUbuntu, which is based on regular Ubuntu with lightweight window manager Xfce. It has lower memory requirements. First I have tried with the latest XUbuntu which is 22, however the only available NVIDIA driver was 510 which is not compatible with NVS 140M. Nouveau drivers do not work either. Finally I have tried XUbuntu 18 and it works just fine. By default it offers NVIDIA 340 driver at Software & Updates section.
In other works, if you have ThinkPad T61 and would like to have decent working experience, go for XUbuntu 16. It even has ability to install as a dual boot with Windows and recognizes previous Ubuntu installations offering understandable messages what will happen during installation.
“Mamy rok 2022. Minęła ponad dekada od pojawienia się OpenCL. Omówię standard, przykładowy sprzęt, a także zaprezentuję rzeczywiste przykłady, które można wykorzystywać obecnie zarówno na historycznym jak i najnowszym sprzęcie, co ma pokazać swego rodzaju uniwersalność tego rozwiązania. Przy okazji zobaczymy jak ewoluowała technologia na przestrzeni ostatnich lat i czy teoria odpowiada praktyce. Udostępnione przykłady pokażą, że dzięki stosowaniu standardu OpenCL możemy uzyskać nawet 50-krotne przyspieszenie działania algorytmu (na korzyść GPU) porównując czas pracy CPU i GPU. Zacznijmy jednak od podstaw, tak aby zrozumieć, dlaczego tak się dzieje…“
Podstawy elektroniki i budowa komputera w symulatorze
“Jest to pierwsza część serii Simple High Performance Computing o tytule Podstawy elektroniki i budowa komputera w symulatorze. Swoim zakresem obejmuje zagadnienia związane z elektroniką, a konkretnie jej podstawami, począwszy od pierwotnych zasad fizyki przekładających się na komponenty elektroniczne, z których można budować złożone układy, a finalnie najprostszą obliczeniową maszynę cyfrową. Największy nacisk kładę na praktyczną część zagadnienia, aczkolwiek teoria również jest przedstawiana.“
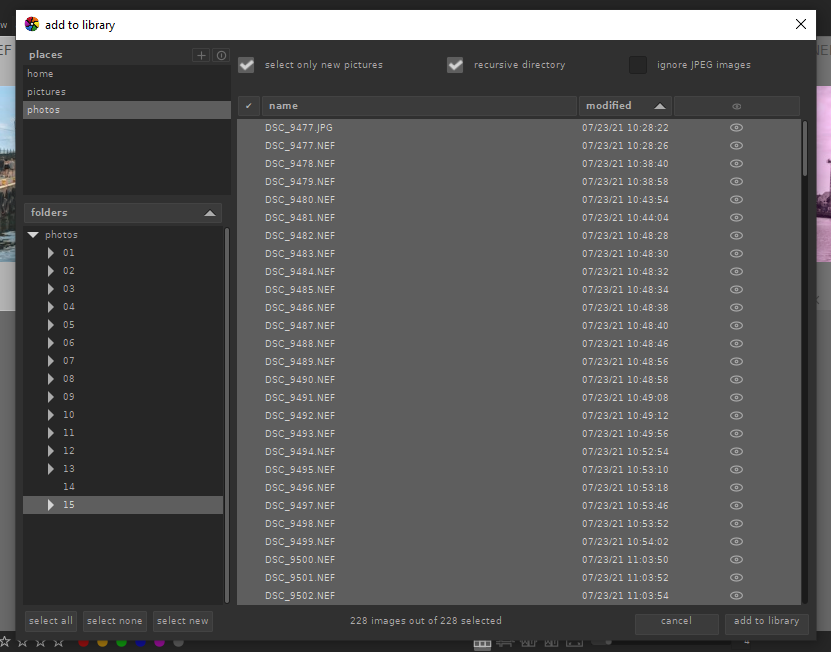
If you try using darktable 3.6 and previously been using older versions then you may be confused. In lighttable, import pane there are two buttons instead of one. Below you can find a little explanation.
1. Add to library
By selecting “add to library” you just collect selected pictures instead of physically copying them. Be sure to check settings, storage, xmp, “write sidecar file each image”. For long time I used this setting to write these xmp files, but recently I decided to skip that option. That way the only option to move around picture with its processing settings is either to export it as JPEG (or other “developed” format) or move whole darktable stuff (database etc.).
2. Select folder
Once you decided if you want to add or copy files as well as to check if you would like to write sidecar xmp files, then step is to select which folder (and files) you would like to consider. Check “recursive directory” and default if you would like to process only RAW files, skipping JPEGs. I import both RAW and JPEGs as most of the time I take both RAW and JPEG at the same time. RAW for full processing and JPEG to quick overview.
Remember that after you press “add to library”, darktable may be a little unresponsive. Be sure to check import progress on the darktable icon. In older versions, darktable been showing import progress on bottom left, but in current versions I could not see this anymore.
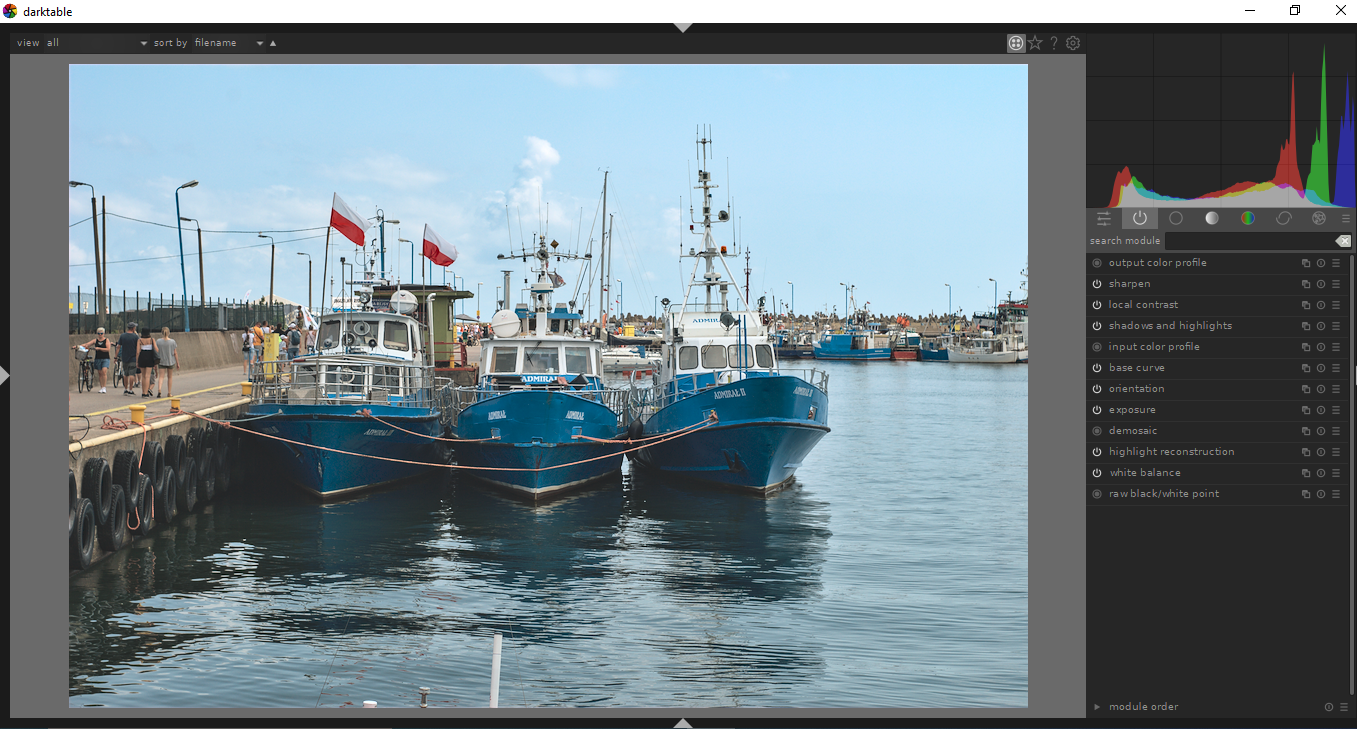
If you shoot RAW then most probably you need to have dedicated software for processing such files. I use darktable, however it is worth to mention that Windows Explorer and built-in image viewer can display RAW image. Just in case there is no other software available at the moment. Still if you need to edit RAW files and not only browse them then you should try darktable. It is open source, free of charge, available for Windows and Linux.
First of all it is great picture browser. You add or copy your files, both from local and remote drives. In case you have network folders, first you need to mount them in the operating system so darktable could see them. You can tag and rate pictures. You can show or hide specific panes depending on your needs.
lighttable
Secondly it has tons of image processing features. I use such tools as sharpen, local contrast, shadows and highlights, exposure, crop and rotate. These are basics. If you put your stuff to commercial stocks, then RAW denoise and profiled denoise are your friends. You can try to minimize chromatic, lens or perspective imperfections with dedicated tools. If you have some dead pixels then you can try tool called hot pixels.
darkroom
In case you would like to experiment a little bit then there is whole section of effects like colorize, grain or split-toning. You can have fun. I really like darktable because of its completeness and nice shortcuts like Alt+1, 2 or 3 for zooms and “w” for full screen preview. Going between light and dark modes is as easy as double clicking on the image itself. Last thing is “tab” which hides all panes except pictures grid or picture itself if in darkroom mode.
I started wondering if cheap YN lens can be compared with with some cheap Nikkor lens. Yes it can. I shoot same lens cap with Nikon D200 with these two lenses with are Yongnuo 50mm/f1.8 and Nikkor 35 – 70mm f3.3/4.5. I think that comparing fixed lens with zoom lens might be weird, but originally I though that even with zoom, Nikkor should be better. I was wrong. If anyone is not convinced why should you buy fixed-focus prime lens below you have practical explanation.
YN 50mm / f1.8 fixed lens
The reason why I even bother to compare them at such a level is that I was disappointed with the Nikkor lens. It produces flat output. I would not say that it is blurry but it is much less vibrant as cheap Chinese fixed lens. Which is somehow interesting.
Nikkor AF 35 – 70 mm / f3.3 – f4.5
As shown below on two samples YN produces much better image which is sharp with plenty of details. Nikkor produces image which is a little softer with less color details.
YN at f/5.6Nikkor at 50mm f/5.6
As a conclusion I should say that maybe comparing fixed lens with zoom is exaggeration, but it is nice to know that there are such differences.
Some time ago I got rid of my D200. But now I have another one in excellent shape. In the past I upgrade from it to D7100 which is better in terms of resolution, sharpness and features. But there are some differences like image plasticity and color vibrance which make D200 still a very good camera. If shooting low light then D7100 wins for sure because of wider dynamic range, but if lighing is fine and you need not to crop pictures then go with other cameras like D200 or D70s. They work very well and produces fine images.