Use Packer & Terraform to generate Ubuntu 22.04-4 server image and deploy it automatically to Proxmox

If you wonder how to automate Ubuntu virtual machine creation and then deploy it to Proxmox in multple copies, then you are looking for Packer and Terraform.

Side note: going for virtual machines in Proxmox is the proper way. I tried for several days to have LXC containers working, however finally I will say that it is not the best option with lot of things going bad like cgroups, AppArmor, nesting, FUSE, ingress networking etc. There is literally too much to handle with LXC and with VM there is no such problem, so discussion end here in favour of Proxmox Qemu. Keep LXC contrainers for simple things.

Why to automate?

Because we can.

Because it is a better way of using our time.

Because it scales better.

Because it provides some form of self-documentation.

Why to use Proxmox and Ubuntu VM?

Ubuntu is a leading Linux distribution without licensing issues with 34% of Linux market share. It has strong user base. It is my personal preference also. It gives us ability to subscribe to Ubuntu Pro which comes with several compliance utilities.

And Proxmox/Qemu started being an enterprise class virtualization software package few years back and it is also a open source leading solutions in its field. In contains clustering features (including failover) as well as support for various storage types. Depending on a source it has around 1% of virtualization software market share.

Installation of Packer and Terraform

It is important to have both Packer and Terraform at its proper versions coming from official repositories. Moreover it is important that the exact way of building specific version of operating system differs from vesion to version, that is way the title of this article says 22.04-4 and not 22.04-3, because there might be some differences.

Install valid version of Packer. The version which come from Ubuntu packages it invalid and it does not contain ability to manage plugins, so be sure to install Packer with official repository.

curl -fsSL https://apt.releases.hashicorp.com/gpg | sudo apt-key add -
sudo apt-add-repository "deb [arch=amd64] https://apt.releases.hashicorp.com $(lsb_release -cs) main"
sudo apt-get update && sudo apt-get install packer

Install valid version of Terraform. Having issues with bundled version of Packer I decided to go for official way of installing at first try:

sudo apt-get update && sudo apt-get install -y gnupg software-properties-common

wget -O- https://apt.releases.hashicorp.com/gpg | \
gpg --dearmor | \
sudo tee /usr/share/keyrings/hashicorp-archive-keyring.gpg > /dev/null

gpg --no-default-keyring \
--keyring /usr/share/keyrings/hashicorp-archive-keyring.gpg \
--fingerprint

echo "deb [signed-by=/usr/share/keyrings/hashicorp-archive-keyring.gpg] \
https://apt.releases.hashicorp.com $(lsb_release -cs) main" | \
sudo tee /etc/apt/sources.list.d/hashicorp.list

sudo apt update

sudo apt-get install terraform

Terraform Telmate/Proxmox

Important note regarding Terraform and its plugin for Proxmox. This plugin as well as Proxmox golang API is provided by a single company which Telmate LLC. This plugin has some compability issues and at the moment for Proxmox 7 I recommend using Telmate/proxmox version 2.9.0. The latest version which is 2.9.14 has some difficulties with handling cloud-init which leads to 50% chance of VM that requires manual drives reconfiguration. As for 2024/09/06 there is no stable 3.0.1 release.

If you happen to have the latest one and would like downgrade, then remove .terraform and .terraform.lock.hcl and then initialize once again with the following command:

terraform init

Generate Ubuntu 22.04-4 template for Proxmox with Packer

Starting from few versions back the Ubuntu project changed its way of automating installations. Instead of seeding you now have a autoinstall feature. Packer project structure contains few files, and I will start with ubuntu-22-template/http/user-data containing cloud-config:

#cloud-config
autoinstall:
  version: 1
  locale: en_US
  ssh:
    install-server: true
    allow-pw: true
    disable_root: true
    ssh_quiet_keygen: true
    allow_public_ssh_keys: true
  packages:
    - qemu-guest-agent
    - sudo
  storage:
    layout:
      name: lvm
      sizing-policy: all
      # password: xxx
  user-data:
    package_upgrade: false
    timezone: Europe/Warsaw
    users:
      - name: temporary
        groups: [sudo]
        lock-passwd: false
        sudo: ALL=(ALL) NOPASSWD:ALL
        shell: /bin/bash
        passwd: "here you place SHA512 generated hash of a password"

In order to turn LUKS on, uncomment storage.layout.password field and set desired password. users.passwd can be generated with mkpasswd using SHA-512. Next is ubuntu-22-template/files/99-pve.cfg:

datasource_list: [ConfigDrive, NoCloud]

Credentials get its own file (./credentials.pkr.hcl). You can of course place it directly into your file, however if you SCM those files it will be permament and shared with others, that is why you should separate this file and even do not include it into your commits:

proxmox_api_url = "https://192.168.2.10:8006/api2/json"
proxmox_api_token_id = "root@pam!root-token"
proxmox_api_token_secret = "your Proxmox token"
my_ssh_password = "your new VM SSH password"

Finally, there is ubuntu-22-template/ubuntu-22-raw.pkr.hcl file, where you define variables, source and build. We source ISO image and define Proxmox VE Qemu VM parameters. The most crucial and cryptic things is to provide valid boot_command. http* sections refers to your machine serving files over HTTP, ssh* section on the other hand refers to configuration relate to the remote machine (newly created VM on Proxmox). Our local machine acts as shell commands provider over HTTP which then being passed to remote machine are executed during system installation.

variable "proxmox_api_url" {
    type = string
}
variable "proxmox_api_token_id" {
    type = string
}
variable "proxmox_api_token_secret" {
    type = string
    sensitive = true
}
variable "my_ssh_password" {
    type = string
    sensitive = true
}

source "proxmox-iso" "ubuntu-server-jammy" {
    proxmox_url = "${var.proxmox_api_url}"
    username =    "${var.proxmox_api_token_id}"
    token =       "${var.proxmox_api_token_secret}"
    insecure_skip_tls_verify = true
    node = "lab"
    vm_id = "141"
    vm_name = "z10-ubuntu-22-template-RAW"
    template_description = "Ubuntu Server Raw Encrypted"
    iso_file = "local:iso/ubuntu-22.04.4-live-server-amd64.iso"
    iso_storage_pool = "local"
    unmount_iso = true
    qemu_agent = true
    scsi_controller = "virtio-scsi-single"
    disks {
        disk_size = "10G"
        format = "raw"
        storage_pool = "vms1"
        storage_pool_type = "directory"
        type = "virtio"
    }
    cores = "2"    
    memory = "4096" 
    network_adapters {
        model = "virtio"
        bridge = "vmbr0"
        firewall = "false"
    } 
    cloud_init = true
    cloud_init_storage_pool = "local"
    boot_command = [
        "<esc><wait>",
        "e<wait>",
        "<down><down><down><end>",
        "<bs><bs><bs><bs><wait>",
        "ip=${cidrhost("192.168.2.0/24", 100)}::${cidrhost("192.168.1.0/24", 1)}:${cidrnetmask("192.168.0.0/22")}::::${cidrhost("1.1.1.0/24", 1)}:${cidrhost("9.9.9.0/24", 9)} ",
        "autoinstall ds=nocloud-net\\;s=http://{{ .HTTPIP }}:{{ .HTTPPort }}/ ---<wait>",
        "<f10><wait>"
    ]
    boot = "c"
    boot_wait = "5s"
    http_directory = "ubuntu-22-template/http" 
    http_bind_address = "IP of machine from which you will run Packer"
    http_port_min = 8802
    http_port_max = 8802
    ssh_host = "192.168.2.100" # new VM proposed IP address
    ssh_username = "temporary"
    ssh_password = "${var.my_ssh_password}"
    ssh_timeout = "20m"
}


build {
    name = "ubuntu-server-jammy"
    sources = ["proxmox-iso.ubuntu-server-jammy"]
    provisioner "shell" {
        inline = [
            "while [ ! -f /var/lib/cloud/instance/boot-finished ]; do echo 'Waiting for cloud-init...'; sleep 1; done",
            "sudo rm /etc/ssh/ssh_host_*",
            "sudo truncate -s 0 /etc/machine-id",
            "sudo apt -y autoremove --purge",
            "sudo apt -y clean",
            "sudo apt -y autoclean",
            "sudo cloud-init clean",
            "sudo rm -f /etc/cloud/cloud.cfg.d/subiquity-disable-cloudinit-networking.cfg",
            "sudo rm -f /etc/netplan/00-installer-config.yaml",
            "sudo sync"
        ]
    }
    provisioner "file" {
        source = "ubuntu-22-template/files/99-pve.cfg"
        destination = "/tmp/99-pve.cfg"
    }
    provisioner "shell" {
        inline = [ "sudo cp /tmp/99-pve.cfg /etc/cloud/cloud.cfg.d/99-pve.cfg" ]
    }
}

To run it:

packer build -var-file=credentials.pkr.hcl ubuntu-22-template/ubuntu-22-raw.pkr.hcl

The installation process is automated and you do not see usual configuration screens. Instead we provide autoinstall configuration and leave few options to be setup later during cloud-init, which is user details and network configuration details. This way we can achieve automation of deployments of such system, which will be show in a moment in Terraform section of this article.

A full overview of project structure is as follows:

├── credentials.pkr.hcl
├── main.tf
├── packer_cache
│   └── port
├── terraform.tfstate
├── terraform.tfstate.backup
└── ubuntu-22-template
    ├── files
    │   └── 99-pve.cfg
    ├── http
    │   ├── meta-data
    │   └── user-data
    └── ubuntu-22-raw.pkr.hcl

5 directories, 8 files

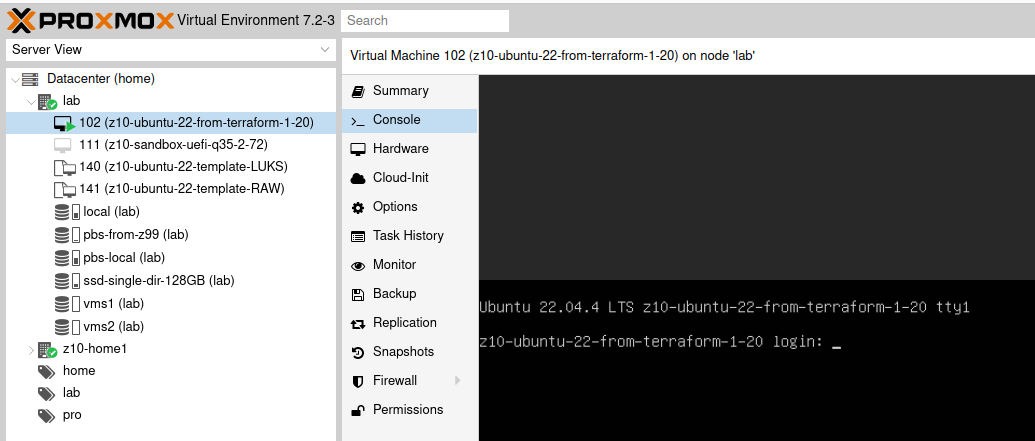
After successful Ubuntu installation system will reboot and convert itself into template so it can be later used as a base for further systems, either as linked clone or full clone. If you prefer having great elasticity then opt for full clone, because you will not have any constraints and limitations concerning VM usage and migration.

Deploy multiple Ubuntu VMs with Terraform

To use Proxmox VM template and create new VM upon it you can do it manually from Proxmox UI. However in case of creating 100 VMs it could take a while. So there is this Terraform utility, which with help of some plugins is able to connect to Proxmox and automate this process for you.

Define Terraform file (.tf) with terraform, provider and resource sections. Terraform section tell Terraform which plugins you are going to use. Provider section tells how to access Proxmox virtualization environment. Finally, resource section where you put all the configuration related to your Ubuntu 22.04-4 backed up with cloud-init. So we start with terraform and required provider plugins. It depends on Proxmox version whever it is 7 or 8 you will be need to give different resource configuration:

terraform {
    required_providers {
        proxmox = {
            source  = "telmate/proxmox"
            version = "2.9.0" # this version has the greatest compatibility
        }
    }
}

Next you place Proxmox provider. It is also possible to define all sensitive data as variables:

provider "proxmox" {
    pm_api_url      = "https://192.168.2.10:8006/api2/json"
    pm_user         = "root@pam"
    pm_password     = "xxx"
    pm_tls_insecure = true
}

First you need to initialize Terraform “backend” and install plugins. You can do this with terraform and provider sections only if you would want. You can also do it after you complete your full spec of tf file.

terraform init

Finally, the resource itself:

resource "proxmox_vm_qemu" "ubuntu_vm" {
    name        = "z10-ubuntu-22-from-terraform-1-20"
    target_node = "lab" 
    clone       = "z10-ubuntu-22-template-RAW"
    memory      = 4000
    cores       = 2 

    network {
        bridge = "vmbr0"
        model = "virtio"
    }

    disk {
        slot = 0
        storage = "vms1"
        size = "10G"
        type = "virtio"
    }
  
    os_type = "cloud-init"
    ipconfig0 = "ip=192.168.2.20/22,gw=192.168.1.1"
    ciuser = "xxx"
    cipassword = "xxx"
}

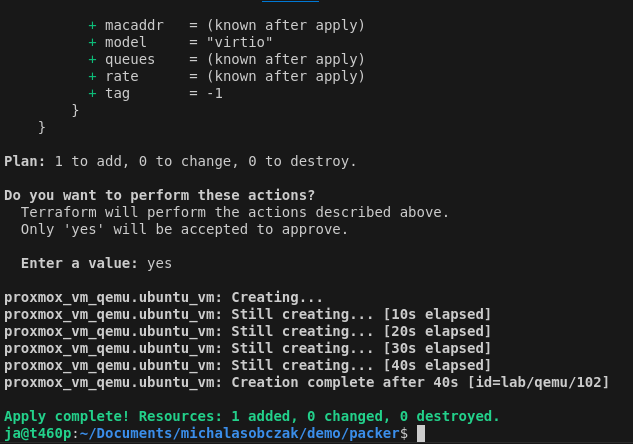
To run this terraform script you first check it with plan command and execute with apply command:

terraform plan
terraform apply

With that, this mechanism is going to fully clone template as new virtual machine with given cloud-init definitions concering user and network configuration.

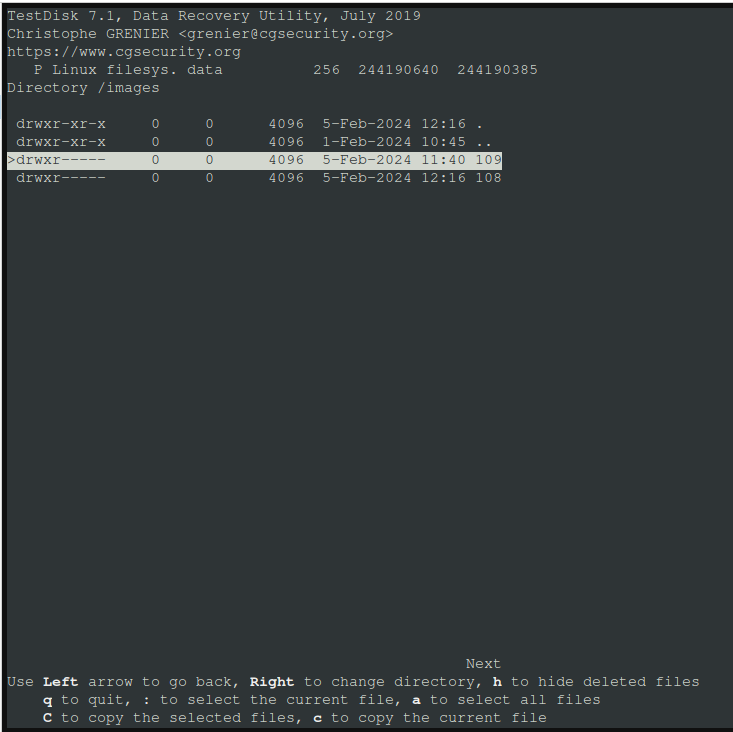
I prepared two sample templates, one with LUKS disk encryption and the other one without LUKS encryption. For demo purposes it is enough to use unencrypted drive however for production use it should be your default way of installating operating systems.

Checkpoint: we have created Ubuntu template with Packer and use this template to create new VM using Terraform.

Further reading

  • https://github.com/Telmate/terraform-provider-proxmox/tree/v2.9.0
  • https://registry.terraform.io/providers/Telmate/proxmox/2.9.0/docs/resources/vm_qemu

NIS 2: anti-rootkit & anti-virus installation and scanning with Ansible

If you run digital services platform or critical infrastructure then most probably you are covered by NIS 2 and its requirements including those concerning information security. Even if you are not covered by NIS 2, then still you may benefit from its regulations which seem to be similar with those coming from ISO 27001. In this article I show how to automatically deploy anti-rootkit and anti-virus software for your Linux workstations and servers.

TLDR

By using rkhunter anti-rootkit and ClamAV anti-virus you are closer to NIS 2 and ISO 27001 and farther away from threats like cryptocurrency miners and ransomware. You can automate deployment with Ansible.

Course of action

  • Prepare Proxmox virtualization host server
  • Create 200 LXC containers
  • Start and configure containers
  • Install rkhunter and scan systems
  • Install ClamAV and scan systems

What is NIS 2?

The NIS 2 Directive (Directive (EU) 2022/2555) is a legislative act that aims to achieve a high common level of cybersecurity across the European Union. Member States must ensure that essential and important entities take appropriate and proportionate technical, operational and organisational measures to manage the risks posed to the security of network and information systems, and to prevent or minimise the impact of incidents on recipients of their services and on other services. The measures must be based on an all-hazards approach.

source: https://www.nis-2-directive.com/

Aside from being a EU legislation regulation, NIS 2 can be benefication from security point of view. However, not complying with NIS 2 regulations will cause significant damages to organization budget.

Non-compliance with NIS2 can lead to significant penalties. Essential entities may face fines of up to €10 million or 2% of global turnover, while important entities could incur fines of up to €7 million or 1.4%. There’s also a provision that holds corporate management personally liable for cybersecurity negligence.

source: https://metomic.io/resource-centre/a-complete-guide-to-nis2

What are the core concepts of NIS 2?

To implement NIS 2 you will need to cover various topics concernig technology and its operations, such as:

  • Conduct risk assesment
  • Implement security measures
  • Set up supply chain security
  • Create incident response plan
  • Perform regular cybersecurity awareness and training
  • Perform regular monitoring and reporting
  • Plan and perform regular audits
  • Document processes (including DRS, BCP etc)
  • Maintain compliance by review & improve to achieve completeness

Who should be interested?

As NIS 2 requirements implementation impacts on businesses as whole, the point of interest should be in organizations in various departments, not only IT but technology in general as well as business and operations. From employees perspective they will be required to participate in trainings concerning cybersecurity awareness. In other words, NIS 2 impacts on whole organization.

How to define workstation and server security

We can define workstation as a desktop or laptop computer which is physically available to its user. On the other hand we can define a server as a computing entity which is intended to offload workstation tasks as well as provide multi-user capabilities. So can describe a server also as a virtual machine or system container instance (such as LXC).

The security concepts within both workstations and servers are basically the same as they do share many similarities. They both run some operating system with some kind of kernel inside. They both run system level software along with user level software. They are both vulnerable to malicious traffic, software and incoming data especially in form of websites. There is major difference however impacting workstation users the most. It is the higher level of variability of tasks done on computer. However, even with less variable characteristics of server tasks, a hidden nature of server instances could lead lack of visibility of obvious threats.

So, both workstation and server should run either EDR (Endpoint Detection and Response), or antivirus as well as anti-rootkit software. Computer drives should be encrypted with LUKS (or BitLocker in case of Windows). Users should run on least-privileged accounts not connecting to unknown wireless networks and not inserting unknown devices to computer input ports (like USB devices which could be keyloggers for instance).

Prepare 200 LXC containers on Proxmox box

Find how to install 200 LXC containers for testing purposes and then, using Ansible, how to install and execute anti-rootkit and anti-virus software, rkhunter and ClamAV respecitvely. Why to test on that many containers you may ask? In case of automation it is necessary to verify performance ability on remote hosts as well as how we identify automation results on our side. In our case those 200 containers will be placed on single Proxmox node so it is critically important to check if it is going to handle that many of them.

Ansible software package gives us ability to automate work by defining “playbooks” which are group of tasks using various integration components. Aside from running playbooks you can also run commands without file-based definitions. You can use shell module for instance and send commands to remote hosts. There is wide variety of Ansible extensions available.

System preparation

In order to start using Ansible with Proxmox you need to install “proxmoxer” Python package. To do this Python PIP is required.

apt update
apt install pip
pip install proxmoxer

To install Ansible (in Ubuntu):

sudo apt-add-repository ppa:ansible/ansible
sudo apt update
sudo apt install ansible

Then in /etc/ansible/ansible.cfg set the following setting which skips host key check during SSH connection.

[defaults]
host_key_checking = False

Containers creation

Next define playbook for containers installation. You need to pass Proxmox API details, your network configuration, disk storage and pass the name of OS template of your choice. I have used Ubuntu 22.04 which is placed on storage named “local”. My choice for target container storage is “vms1” with 1GB of storage for each container. I loop thru from 20 to 221.

The inventory for this one should contain only the Proxmox box on which we are going to install 200 LXC containers.

---
- name: Proxmox API
  hosts: proxmox-box
  vars:
    ansible_ssh_common_args: '-o ServerAliveInterval=60'
  serial: 1
  tasks:
  - name: Create new container with minimal options
    community.general.proxmox:
      node: lab
      api_host: 192.168.2.10:8006
      api_user: root@pam
      api_token_id: root-token
      api_token_secret: TOKEN-GOES-HERE
      password: PASSWORD-GOES-HERE
      hostname: "container-{{ item }}"
      ostemplate: 'local:vztmpl/ubuntu-22.04-standard_22.04-1_amd64.tar.zst'
      force: true
      disk: "vms1:1"
      netif:
        net0: "name=eth0,gw=192.168.1.1,ip=192.168.2.{{item}}/22,bridge=vmbr0"
      cores: 2
      memory: 4000
    loop: "{{ range(20, 221) }}"

And then run this playbook to install containers:

ansible-playbook containers-create.yml -i inventory.ini -u root

Start and configure containers

In order to start those newly created containers (run it on Proxmox box), use shell loop with pct command:

for i in `pct list | grep -v "VMID" | cut -d " " -f1 `; 
do 
  pct start $i; 
  echo $i; 
done

To help yourself with generating IP addresses for your containers you can use “prips”:

apt install prips
prips 192.168.2.0/24 > hosts.txt

For demo pursposes only: next, you enable root user SSH login as it is our only user so far and it cannot login. In a daily manner you should use unprivileged user. Use shell loop and “pct” command:

for i in `pct list | grep -v "VMID" | cut -d " " -f1 `; 
do 
  pct exec $i -- sed -i 's/#PermitRootLogin prohibit-password/PermitRootLogin yes/g' /etc/ssh/sshd_config; 
  echo $i; 
done

for i in `pct list | grep -v "VMID" | cut -d " " -f1 `; 
do 
  pct exec $i -- service ssh restart; 
  echo $i; 
done

Checkpoint: So far we have created, started and configured 200 LXC containers to run further software intallation.

rkhunter: anti-rootkit software deployment

You may ask if this anti-rootkit is real world use case? Definitely it is. From my personal experience I can say that even using (or especially, rather) well known brands for you systems layer like public cloud operators you can face with risk of having open vulnerabilites. Cloud operators or any other digital services providers often rely on content from third party providers. So effectively quality and security level is as good as those third parties provided. You can expect to possibly receive outdated and unpatched software or open user accounts etc. This can lead to system breaches which then could lead to data steal, ransomware, spyware or cryptocurrency mining and many more.

There are similarities between anti-rootkit and anti-virus software. rkhunter is much more target at specific use cases so instead of checking hundred thousands of virus signatures it looks for well known hundreds of signs of having rootkits present in your system. You can then say that is a specialized form of anti-virus software.

Installation of anti-rootkit

First install rkhunter with the following playbook:

---
- name: install rkhunter
   hosts: all
   tasks:
     - name: Install rkhunter Ubuntu
       when: ansible_distribution == "Ubuntu"
       ansible.builtin.apt:
         name: rkhunter
         state: present
     - name: Install epel-release CentOS
       when: ansible_distribution == "CentOS"
       ansible.builtin.yum:
         name: epel-release
         state: present
     - name: Install rkhunter CentOS
       when: ansible_distribution == "CentOS"
       ansible.builtin.yum:
         name: rkhunter
         state: present

Execute it with Ansible:

ansible-playbook rkhunter-install.yml -i hosts.txt -u root

Scanning systems with anti-rootkit

And then scan with rkhunter:

---
- name: Run rkhunter
   hosts: all
   tasks:
     - name: Run rkhunter
       ansible.builtin.command: rkhunter -c --sk -q
       register: rkrun
       ignore_errors: true
       failed_when: "rkrun.rc not in [ 0, 1 ]"

Execute it with Ansible:

ansible-playbook rkhunter-run.yml -i hosts.txt -u root

To verify results it is much easier to run it separately using ansible command instead of ansible-playbook which runs playbooks:

ansible all -i hosts.txt -m shell -a "cat /var/log/rkhunter.log | grep Possible | wc -l" -u root -f 12 -o

Results interpretation and reaction

What in case if you see some “Possible rootkits”? First of all calm down and follow incident management procedure, if have such.

192.168.2.23 | CHANGED | rc=0 | (stdout) 0
192.168.2.31 | CHANGED | rc=0 | (stdout) 0
192.168.2.26 | CHANGED | rc=0 | (stdout) 0
192.168.2.29 | CHANGED | rc=0 | (stdout) 0
192.168.2.24 | CHANGED | rc=0 | (stdout) 0
192.168.2.27 | CHANGED | rc=0 | (stdout) 0
192.168.2.22 | CHANGED | rc=0 | (stdout) 0
192.168.2.28 | CHANGED | rc=0 | (stdout) 0
192.168.2.21 | CHANGED | rc=0 | (stdout) 0
192.168.2.20 | CHANGED | rc=0 | (stdout) 0
192.168.2.25 | CHANGED | rc=0 | (stdout) 0

If you do not have proper procedure, then follow the basic escalation path within your engineering team. Before isolating the possibly infected system, first check if it is not a false-positive alert. There are plenty of situations when tools like rkhunter will detect something unusual. It can be Zabbix Proxy process with some memory alignment or script replacement for some basic system utilities such as wget. However if rkhunter finds well known rootkit then you should start shutting system down or isolate it at least. Or take any other planned action for such situations.

If you found single infection within your environment then there is high chance that other systems might be infected also, and you should be ready to scan all accessible things over there, especially if you have password-less connection between your servers. For more about possible scenarios look for MITRE ATT&CK knowledge base and framework.

ClamAV: anti-virus deployment

What is the purpose of having anti-virus in your systems? Similar to anti-rootkit software, a anti-virus utility keep our system safe and away from common threats like malware, adware, keyloggers etc. However it has got much more signatures and scans everything, so the complete scan takes lot longer than in case of anti-rootkit software.

Installation of anti-virus

First, install ClamAV with the following playbook:

---
- name: ClamAV
  hosts: all
  vars:
    ansible_ssh_common_args: '-o ServerAliveInterval=60'

  tasks:
     - name: Install ClamAV
       when: ansible_distribution == "Ubuntu"
       ansible.builtin.apt:
         name: clamav
         state: present
     - name: Install epel-release CentOS
       when: ansible_distribution == "CentOS"
       ansible.builtin.yum:
         name: epel-release
         state: present
     - name: Install ClamAV CentOS
       when: ansible_distribution == "CentOS"
       ansible.builtin.yum:
         name: clamav
         state: present

Then execute this playbook:

ansible-playbook clamav-install.yml -i hosts.txt -u root

With each host containing ClamAV there is clamav-freshclam service which is tool for updating virus signatures databases locally. There are rate limits. It is suggested to set up a private mirror by using “cvdupdate” tool. If you leave as it is, there might be a problem when all hosts ask at the same time resulting in race condition. You will be blocked for some period of time. If your infrastructure consists of various providers, then you should go for multiple private mirrors.

Scanning systems with anti-virus

You can either scan particular directory or complete filesystem. You could either run scan from playbook, but you can run it promply using ansible command without writing playbook. If seems that ClamAV anti-virus, contrary to rkhunter, returns less warnings and thus it is much easier to manually interpret results without relying on return codes.

ansible all -i hosts.txt -m shell -a "clamscan --infected -r /usr | grep Infected" -v -f 24 -u root -o

You can also run ClamAV skipping /proc and /sys folders which hold virtual filesystem of a hardware/software communication.

clamscan --exclude-dir=/proc/* --exclude-dir=/sys/* -i -r /

There is possiblity to install ClamAV as a system service (daemon), however it will be much harder to accomplish as there might be difficulties with AppArmor (or similar solution) and file permissions. It will randomly put load on your systems, which is not exactly what we would like to experience. You may prefer to put scans in cron schedule instead.

Please note: I will not try to tell you to disable AppArmor as it will be conflicting with NIS 2. Even more, I will encourage you to learn how to deal with AppArmor and SELinux as they are required by various standards like DISA STIG.

To run ClamAV daemon it is requied to have main virus database present in your system. Missing this one prevents this service from startup and it is directly linked with freshclam service.

○ clamav-daemon.service - Clam AntiVirus userspace daemon
     Loaded: loaded (/lib/systemd/system/clamav-daemon.service; enabled; vendor preset: enabled)
    Drop-In: /etc/systemd/system/clamav-daemon.service.d
             └─extend.conf
     Active: inactive (dead)
  Condition: start condition failed at Mon 2024-09-02 15:24:40 CEST; 1s ago
             └─ ConditionPathExistsGlob=/var/lib/clamav/main.{c[vl]d,inc} was not met
       Docs: man:clamd(8)
             man:clamd.conf(5)
             https://docs.clamav.net/

Results interpretation and reaction

Running clamscan will give us this sample results:

Using /etc/ansible/ansible.cfg as config file
192.168.2.33 | CHANGED | rc=0 | (stdout) Infected files: 0
192.168.2.23 | CHANGED | rc=0 | (stdout) Infected files: 0
192.168.2.28 | CHANGED | rc=0 | (stdout) Infected files: 0
192.168.2.42 | CHANGED | rc=0 | (stdout) Infected files: 0
192.168.2.26 | CHANGED | rc=0 | (stdout) Infected files: 0
192.168.2.29 | CHANGED | rc=0 | (stdout) Infected files: 0
192.168.2.38 | CHANGED | rc=0 | (stdout) Infected files: 0
192.168.2.45 | CHANGED | rc=0 | (stdout) Infected files: 0
192.168.2.40 | CHANGED | rc=0 | (stdout) Infected files: 0
192.168.2.32 | CHANGED | rc=0 | (stdout) Infected files: 0

As it is a manual scan, it will be straightforward to identify possible threats. In case of automatic scan or integration with Zabbix you will need to learn what clamscan could possibly output, same as with rkhunter output.

Conclusion

Automation in the form of Ansible can greatly help in anti-rootkit and anti-virus software deployment, rkhunter and ClamAV respectively. These tools will for sure increase the level of security in your environment if will cover all the systems up and running. Having automation itself is not required by NIS 2 directly, however in positively impacts for future use.

Further reading

Private cloud for 50€ (Hetzner, Proxmox, pfSense, HAProxy, Docker Swarm, Portainer, Suricata, PBS)

Create secure, high-performance, affordable environment for your container applications using Hetzner dedicated servers.
For around 50€ per month.

This setup can also be done using different server providers, both dedicated and shared, even on public cloud. This tutorial has not been sponsored by Hetzner or any other software vendors. If you are interested in similar setup, please drop me a message via Linkedin.

Goal

The goal for this setup is to run Docker container in Swarm mode in secure and reliable environment. For sake of security we enable Proxmox firewall, pfSense firewall and Suricata IDS/IPS. For sake of reliability we configure md RAID and create 3 different combined backups targets. To turn this setup into production one, just add two or more Proxmox nodes and two or more Swarm nodes. You will be good to go with your online business.

Hetzner dedicated servers

00:10: Start with visiting Hetzner portal called Robot. It is for managing dedicated servers. We can either rent brand new server with the latest hardware available or go to server auction for a little bit older hardware but for better prices. For this test I will pick server from auction with at least 3 drives inside and 64 GB or memory. Both for test and production setups I suggest picking up enterprise grade CPU like Xeons which tend to better on long term basis and are much most stable than desktop grade CPUs.

Once ordered you will have to wait for your order completion which should take 15 to 30 minutes for most the times, but in case of custom setup you will have to wait even 5 working days, so be sure to order with enough notice period. Your orders will be shown in Server section where you can inspect the server, send remote reboot or order serial console in case of some troubles. Next you give your server a name and add it to virtual switch called vSwitch. It will enable your server for communication with your other servers binded to the same vSwitch ID. Important thing that the MTU must be 1400. For our test setup I also order additional public IP. You need to write usage explanation as IP4 pool is limited. This additional public IP will be used for pfSense router/firewall which will handle all the operations traffic.

Proxmox virtualization

01:52: After the order is completed you receive root user password over email, so be sure to change it at your earliest convenience. I SSH into the server where you can see brief overview of what is inside, what kind of CPU and drives we have and that type of ethernet adapter is installed. System installation can be run using installimage utility. Few things important here, SWRAID, SWRAIDLEVEL, HOSTNAME and partitions setup. Be sure to install only on 2 same size drives and leave other unconfigured. Software mirror, similar to RAID will be handled by md. Be sure not to install system on spinning drives as there will be significant bottleneck in terms of IO available which will be noticeable.

After Debian installation is completed, reboot the server and wait until it is back again. If server is not coming back, then restart it from Robot panel. SSH once again and start installation of Proxmox using my step-by-step tutorial. It covers system update, adding required repositories and installation or Proxmox packages and services. Speed of this process depends on our hardware specification, especially drives on which the system is installed on. It is worth pointing out that Proxmox uses custom Linux kernel and it is suggested to remove other ones.

Having Proxmox installation completed, it is time for disable RPC bind services enabled by default, running on port 111. It is required to have it off from the network if you are in German internet as it is a government requirement. Since we do not need this in test setup we are good to go further with network configuration. If we use only public network and vSwitch then we need to have a bridge, public IP routing and VLAN section. If we would use additional local LAN or VLAN or use separate physical and dedicated switch then there will be need to add additional sections here. Be sure to double or even triple check you configuration, after network reload it have to work. Otherwise you need to opt for remote serial console which takes sometimes even up to an hour. I personally prefer having a consistent naming scheme for server, VLANs and subnets as you may notice. Remember to include 1400 MTU in VLAN section. After networking service restart check local and external connectivity.

As an interesting pick we try to import Proxmox CA into browser certificates store in order to have SSL padlock clean without any security warnings. As for this, we need to have certificate common name set in /etc/hosts to have running. Later on we are going to configure HAProxy over OpenVPN.

The first configuration we will conduct it is a firewall configuration. I put VLAN, LAN and public IP4 addresses in Datacenter-Firewall section which will be applied on all nodes in Proxmox cluster. Of course if we will add additional nodes. Datacenter configuration is then much easier to manage. Firewall will be enable only after going into Firewall-Options and marking it as enabled. Remember to add yourself’s public IP4 address not to cut out the connection.

pfSense firewall/router

11:54: For handling public traffic I install pfSense router/firewall which can be also extended with additional packages providing wide range of features, like VPN, IDS/IPS appliance etc. We start with uploading pfSense 2.7 CE, which will also require us to do an upgrade. Before continuing I review drives condition using SMART interface. And quickly initialize third drive as a directory, need for future PBS installation. I also upload PBS ISO image as well as Ubuntu ISO image.

Create new VM with basic settings. It is important to have at least one network adapter. The first one will be for WAN interface and second one for VLAN where we set MTU 1400. On WAN we set virtual MAC address created earlier in Robot portal. It is critical to have it on WAN if running VM on the server. Missing this setting will cause MAC bleeding warning from Hetzner and even server lock. pfSense installation is straightforward. We pick all default settings. Since we use md for drive mirroring there is no need to configure this redundancy for pfSense. After reboot, pfSense asks for network configuration, both for LAN and WAN interfaces. Need to adjust it. At first, UI is accessible over WAN as we do not have option to go into LAN/VLAN. You could setup sandbox VM from where you could access local network, but for this test setup we will continue with WAN until OpenVPN will be configured. After any major pfSense configuration change it is good practice to reboot it.

Using WAN without Rules setup means that you have to do pfctl -d to disable firewall. Login using default credentials and go thru UI step-by-step configuration. You can change DHCP WAN settings and put explicitly WAN default gateway as it seems not to be set.

pfSense dashboard, which is main page can be enhanced with few fancy graphs concerning service and network statistics. Main configuration can be done in System – General Setup or Advanced settings. We setup domain, timezone and DNS configuration. For later HAProxy you need to disable auto WebGUI port redirect, even having it on different port than standard one, which is a good practice both for UI and OpenVPN services running on the box.

For OpenVPN use we need to create CA certificate to be ble to sign server certificate. Then create certificate. Next create OpenVPN server port pass rule. Then go to Services-OpenVPN and add new OpenVPN server with SSL/TLS + User Auth configuration on TCP IP4 only. Be sure to point server certificate, it is easy to miss that or select even some user certificate. Set tunnel network addressing for clients endpoints as well as local network which will be routed to the environment. It is good to have consistency for tunnel subnet numbering and also have set concurrent connections to some lower value to quickly identify possible misuse.

To use OpenVPN you will need a user with a user’s certificate. First create user and then create it’s user certificate. Now comes the quirky part, which is installing pfSense additional packages on outdated base system. There is an error message which leads us to System-Update setting. By trial-and-error I know that it is necessary to update system first, but it varies from version to version. This time neither UI upgrade nor console upgrade worked for me. Solution was to rehash certificates. On various previous versions there have been other solutions to similar compatibility issues. No doing it right could brick the system, so be sure to have backup before starting such troubleshooting session.

Finally after rehashing certificates we can proceed with upgrade. Without upgrade packages were not available. This upgrade process takes few minutes.

How to import OpenVPN user configuration into Ubuntu? Either by using GUI or nmcli utility. I find the latter easier and more stable across various previous Ubuntu versions. Even with imported configuration you still need to provide username, password and select Use this connection only for resources on its network. To use connections over OpenVPN interface we need to add appropriate passing rules. If you want to diagnose connectivity with ping then be sure to pass ICMP traffic as well. Check if OpenVPN client is connected, if you already created ICMP rule, and in case it still does not work, then reboot to shorten configuration apply time.

HAProxy

19:10: Proxmox server access can be achieved using HAProxy. First we define backend which is target server at port 8006. As we do not have options to load balance it at the moment it’s better to disable health checks. Secondly we define frontend at some custom port on LAN interface with TCP runtime type and backend set to what we have configured a moment ago. In settings we need to enable HAProxy, define maximum connections, set internal stats ports and lastly set max size of SSL DH parameter.

It’s good to clean up unused firewall rule.

We choose port 9443 for Proxmox UI and from now we need not to use public WAN interface to access it as there is tunneled OpenVPN connection available. Why do we even need to set HAProxy for Proxmox UI? Because Proxmox does not route itself thru pfSense which offers OpenVPN, there is need to access it either WAN, NAT-proxy or what we have just made which is HAProxy configuration.

Now, since we have a secured Proxmox UI connection, it’s time for setting up 2FA with TOTP. Some caveats concerning this one, if you want to create cluster and then add additional server to it (it must be empty, without VM/containers), then you need to disable it, add server to cluster and then enable it once again. Moreover most probably you would need to restart pvestatd service as it gets out of sync most of the time.

Suricata IDS/IPS security appliance

21:03: Interfaces list is empty on start, so need to create one, particularly for WAN interface. What is important here is to enable Block Offenders in Legacy model, blocking source IP. As for sensitivity of detect-engine I prefer setting either as Medium or High. In terms of rules and its categories there are two approaches. The first one tell that you should disable technical rules for flows etc, which will for sure decrease amount of false-positive blocks. However, by doing this we will welcome much more invalid traffic. So, there it is a second approach, where we leave this enabled and take care of false-positive blocks manually. I recommend enabling almost all of EP Open Rules categories. The most important thing here is to enter emerging-scan rules set and enable all nmap scan types as they are disabled by default for some unknown to me reason. This way we will be able to block the most popular scans. Same thing with emerging-icmp rules set.

To be able to comply with various security policies and standards it’s good to know that there is possibility to enlongen logs retention period for lets say 3 months. We can also send logs to remove syslog both configured from Suricata directly or in general pfSense settings also. At this point, we can enable, start Suricata, running on our WAN interface. On alerts tab we can monitor security notifications and also unblock source IP addresses here directly. On blocks tab, there is list of all currently blocked IP addresses, from where we can unblock them or see if this happen already in the past as there is a list of previous incidents.

It did not even take a minute a get some incidents on the list. One is from technical set of rules, like TCP packets validity verification and two others are from scan and spamhouse rules set from ET. This means that we have been both scanned and communicated from entity enlisted in Spamhaus directory, group 9 to be clear. Running Suricata on few dozens boxes for few months will give us millions of numerous alerts and blocks. Sometimes source IP addresses will be repeated between different locations meaning that either someone scans whole IPv4 blocks, target ISP or target exactly you as a person or organization running this boxes. On the alerts tab you can lookup reverse DNS for IP addresses as well as try to geo-locate them. It may or may not be useful information, depending on your needs to forensics analysis in your business case.

When interconnecting systems, either thru public interface or VPN tunnel it is common thing that system will cross-diagnose itself and put blocks. To avoid such a situation there is pass list tab, where you can enlist your systems public IP addresses to prevent from blocking. Once you have created some pass list containing external public IP addresses you can bind it to interface on interface edit page.

Ubuntu VM

24:44: Little overview, we purchased, rented a dedicated server, installed Debian, Proxmox, pfSense, HAProxy and now we face with creating Ubuntu VM which will later on hold a Docker Swarm master/worker node handled by Portainer CE orchestration utility. Creating new VM is straightforward as we go with basics. However concerning a Ubuntu server installation there are few options. First of all we can use HashiCorp Packer or even Terraform, as there is some provider for Proxmox 7. Moreover instead of manually create installable image we could create autoinstall or cloud-init configuration which will do it automatically. For the purpose of this video I will go manually. It’s important that every system drive at any provider including your home, should be secured by an encryption service such as LUKS. On this topic you can find some article on my blog. For the ease of use I prefer to manually enter LUKS password for decrypting drive. There are other options as well but require additional software or hardware.

After base system extraction and installation, there are some additional packages to be installed and updated fetched and apply also. It will take a few moments depending on the hardware of your choice.

Now the system installation is completed and we can eject ISO image and hit reboot an test LUKS decryption for the system drive.

Docker Swarm + Portainer

26:55: This section starts with Docker-CE service and tools installation as it is a vital part of Docker Swarm setup with Portainer used to orchestrate containers. When I look for some verified and well tested setup tutorials I often visit DigitalOcean website, which is great cloud computing provider I use for over a decade once I switched to it from Rackspace. Within that time around 2010s these companies have been starting well but have been overtaken (in the field of public cloud solutions) by Google, Microsoft and Amazon quite quickly and instead of hard-competing they decided to choose different business approaches to stay on the market.

Once we have installed Docker-CE service we can continue with initializing Docker Swarm. But before we can do it, there is need to manually create docker_gwbridge and ingress networks, just before you would run docker swarm init. Why is that you may ask? Well, it’s because Hetzner requires you to run MTU 1400 and Docker actually does not support changing MTU on-the-fly, it does not follow host network settings. With that said you can either leave network as they are, but do not use vSwitch or use host only port mapping which will make binding to host adapter instead of ingress. But in real world case it is good to have possibility to create Docker Swarm with more than one node, at least 3 master modes (uneven number required) and also 3 worker nodes. Such a setup can be spread across few different physical boxes, connected thru vSwitch in Hetzner which runs at 1 Gpbs at its maximum. Even if you do not plan to use similar setup it’s good to have MTU set to proper value because you would be struggling with services migrations after Docker Swarm it’s initialized and in production use.

Now regarding Portainer CE which is a UI for managing Docker containers, Swarm setups and many many. There is business edition with even more features available. Highly recommend it, especially if you look for smart and simple solutions for your containers and struggle with OpenShift/OKD/Kubernetes. I have commercial experience with all of them so I can tell you that there are some things that the duo Docker Swarm and Portainer lack, but those lacking things can be easily replaced with some other solutions. In case of the installation, you just download YML file with configuration of containers and so. As those things which are UI and agent will run within custom network, there is also a need to adjust MTU in this configuration file, before deploying.

It takes about a minute to download images and run them in Docker. UI is available on port 9443. Initially you create user with password and you are in. The primary environment is the local one and as Portainer runs with local volume it should stay on this particular node. Agent however is deployed with global parameter, which means that it will be deployed on every node in the Docker Swarm cluster which is available.

Now it is time for hello world container on our newly installed virtualization and containers environment. There are two types of testing images. First one is to check if anythings works at all and its called hello-world. It checks if Docker can pull images from the internet or other network and if container spawning works. As it does not have any hanging task, it will cycle after each and every run. So it is good to test with something more useful, as nginx for instance.

Nginx is a HTTP server, so it’s now worth setting up a port mapping which will utilize a internal Docker Swarm network called ingress. It take few seconds to download image and run it. We can check already in browser at the port of our choice if the service is actually running. And it is. However it is a local network connection accessible only over OpenVPN tunnel. To make this Nginx server accessible from the public internet we can use HAProxy. For low to mid traffic which is up to 20 thousand concurrent user will be fine to use single pfSense HAProxy instance as it’s enough in terms of performance, configuration etc. For bigger deployments I would recommend dynamic DNS such as one available on scaleway.com, multiple pfSense boxes with seperate public IP addresses and separate HAProxy either on pfSense or also separately.

This time, instead of TCP processing type as in case of Proxmox UI, we gonna use http / https (offloading) which would encrypt the traffic which is reverse proxied to backend server with no encryption as we do not provide encryption on nginx side at the moment. What is the benefit of having TLS offloaded onto pfSene box? First of all there is less configuration to manage as we either enter certificate in certificates store or use ACME with LetsEncrypt for instance. Second of all it just separates environment entrypoint from the system internals in the local network.

As we run HAProxy on WAN iterface now, there is need to create firewall rule for all the ports used in our setup. This test setup covers only unencrypted traffic. Encrypted traffic will also require HTTPS pass rule as well as redirect scheme on HAProxy frontends. It is as good practice in pfSense to have rules organized using separators, it makes just everything here much more clear. Be sure to either provide proper health check and have multiple backends or just disable this feature as you have only one backend.

Proxmox Backup Server

33:44: The last topic in our test setup is a backup, which is very important thing aside from functional features of this environment. We start with creating PBS VM with some basic settings. System is a Debian and it requires not so big root partition, but it requires quite a lot a memory which will be even more important if we have slow drives. Remember that encryption of backups happens on client side in Proxmox. PBS installations is straightforward without any quirks. For now we have only one drive which is for system use.

Once installation is done we add additional drive which will be used as a backup storage. Remember to uncheck backup checkbox. We can add drive live while the system is running. The easiest options is to create a directory which will be mounted with either ext4 of xfs filesystem. Depending on the drive size the initialization process will take from a minute up to 15 minutes or so.

In order to add PBS into Proxmox VE you need to go to Datacenter level – Storage and create new entry with PBS integration. Username requires adding @pam. You need to provide also a datastore name which we just created. Finally to authorize our integration you need to grab fingerprint from PBS UI. Once added, PBS integration with datastore will be present in storage section on choosen selected nodes.

To create backup job, go to Datacenter-Backup. You can choose between local backup and PBS backup. First we define what to backup and with what kind of schedule. Very important is to configure client side encryption which can be done editing PBS integration, on Encryption tab. Auto-generate key and secure it buy keeping it safe in at least 2 locations also being encrypted.

First we test backup job running backup directly on local drive which will be a local copy. It should run significantly faster than running thru PBS, so in some cases this could be a way to run backup, when you cannot lag memory or network. Moreover it is one of methods to have separated backups on different mediums. In case of course when you have PBS on separate drive which is the case here. Now we take cross-out first requirement from standard backup and data protection policy – to have separate physical copies.

Going a little bit further with the backup and the standards and policies thing is to create second backup server with also PBS. For sake of test of course we keep in the same location, but in real world case, it will be different physical location, even different Proxmox cluster. The purpose of having it is to do a backup in main PBS and synchronize it to the second PBS server. This way we can achieve various level of backup and data protection. We can differentiate backup retention on master and sync, deciding where to put more is where we have more space to dedicate for backups.

With the second PBS we create everything the same way. First new thing is to add Remote which is our source server from which we will pull backup chunks. Now with remote configured, we go to Sync Jobs tab where we define how often to synchronize and for how long we should keep those synchronized backups. Both for main and secondary backup server it is recommended to configure prune on servers side. Same applied for garbage collection tasks. Remember that GC keeps chunks for further 24 hours even then prune got rid of the backup itself. That’s the way it works, so with this in mind we need to consider proper capacity planning in terms of the number of copies kept.

Now we have backed-up locally, remotely and synchronized those backups to 3 medium. We should be safe for now, of course if sync server would be located outside the server.

Same as for Proxmox, here in PBS we can also configure 2FA TOTP.

Encrypt with LUKS an unencrypted LVM Ubuntu 22 Server without system reinstallation

Keep your data safe. Device loss or unauthorized access can be mitigated by encrypting drive in your server and workstation.

So you may have a Ubuntu Linux installation on your bare metal or virtual machine. Does it have an encrypted drive? If the answer is no, then you could be in trouble when device is stolen or lost, or someone just gained unauthorized access to your hardware. In this short step-by-step article you can see what steps your should take to encrypt your unencrypted drives without need to reinstall the system.

When speaking workstation, there is much less concern about system reinstallation. Just move out your data, configuration in favourable time and proceed with clean system installation, now with proper drive encryption configured. But hold on a second. If there is option to encrypt without need to reinstall your system, then why just not try it?

It is especially important when talking about server installations running production software handling customers data. You can opt for system replacement in maintainance window and redo all your work. But, sometimes it is not a option. Actually it does not matter what kind of you unmaintained and obsolote software you run on your unencrypted servers. I think most of us know at least one example of such a thing. With such a problematic software it would better to just do it as-is without additional steps required.

How to migrate data?

Here you can learn how to encrypt your existing data on LVM based drives in Ubuntu 22 server virtual machine. To get started you need to add additional drive to your system with equal or more space than on unencrypted drive. Lets say your source is at /dev/sda and your spare drive is at /dev/sdb. I assume that it is a default setup with 3 partitions. First one is for GRUB spacer, second for boot and thind for root filesystem.

Boot your VM with GRML ISO. On Proxmox, when VM is starting, press Esc and select disc drive with ISO mounted.

Once booted into GRML…

Create PV and extend existing VG with new drive:

pvcreate /dev/sdb
vgextend ubuntu-vg /dev/sdb

Move your data to new drive:

pvmove /dev/sda3 /dev/sdb

Get rid of existing source unencrypted drive from VG and remove PV:

vgreduce ubuntu-vg /dev/sda3
pvremove /dev/sda3

Now it’s time to wipe existing unencrypted drive:

crypt setup open --type plain -d /dev/urandom /dev/sda3 to_be_wiped
dd if=/dev/zero of=/dev/mapper/to_be_wiped bs=1M status=progress
cryptsetup close to_be_wiped

Now the most important aspect of the procedure. Create mountpoint for boot and write a LUKS header over there. It is critical to save this header on permanent storage. If header with keys is lost then your data will be lost also. Keep this in mind:“`

mkdir /mnt/boot
mount /dev/sda2 /mnt/boot

Encrypt and open drive container:

cryptsetup -y luksFormat /dev/sda3 --header /mnt/boot/luksheader.img
cryptsetup luksOpen /dev/sda3 lvmcrypt --header /mnt/boot/luksheader.img

Create new PV and include it into existing VG.

pvcreate /dev/mapper/lvmcrypt
vgextend ubuntu-vg /dev/mapper/lvmcrypt

Move your data from additional spare drive into newly created lvmcrypt container:

pvmove /dev/sdb /dev/mapper/lvmcrypt

And finally, remove this new drive from VG and remove PV itself:

vgreduce ubuntu-vg /dev/sdb
pvremove /dev/sdb

How to update initramfs with detached LUKS2 header

So what is the deal with this LUKS2 header being detached. In this format, first 16MB of space is used for header. Once the original drive includes this space it will not have enough proper space for data which needs to be moved back again. The second reason to have detached header is to increase security level somehow. But remember that in case of loss of the device or filesystem holding it you permamently loose your data also. So…

If booting once again into GRML:

mkdir /mnt/luks
cryptsetup luksOpen /dev/sdb3 lvmcrypt --header /mnt/boot/luksheader.img
vgchange -ay
mount /dev/mapper/ubuntu--vg-ubuntu--lv /mnt/luks

If you continue without rebooting you can just create mountpoint directory and mount it:

mkdir /mnt/luks
mount /dev/mapper/ubuntu--vg-ubuntu--lv /mnt/luks

Mount and bind necessary special directories and then chroot into the system:

mount -t proc proc /mnt/luks/proc
mount -t sysfs sys /mnt/luks/sys
mount -o bind /dev /mnt/luks/dev
mount --bind /run /mnt/luks/run
mount /dev/sda2 /mnt/luks/boot
chroot /mnt/luks /bin/bash

Now you are back in your Ubuntu, in your encrypted drive. Is it over? No. We need to tell at boot time where there LUKS2 header is stored. Copy your header into any additional drive found. It case of VM it could be 0.1GB drive. In case of workstation it can be a USB pendrive:

dd if=/boot/luksheader.img of=/dev/sdb

Edit your /etc/crypttab file with the following:

lvmcrypt PARTUUID=A none luks,header=/dev/disk/by-uuid/B

where A is your blkid /dev/sda3 and B is your blkid /dev/sdb.

Finally, regenerate initramfs:

update-initramfs -c -k all
exit
reboot

You’re good to go. Now your drive is encrypted and you will be asked for password set earlier every time you boot the system. To be clear, you need to keep safe your additional drive holding the LUKS2 header. After you booted the system, the drive or pendrive can be removed, but it need to be inserted once again on every further reboots.

Further reading

https://unix.stackexchange.com/questions/444931/is-there-a-way-to-encrypt-disk-without-formatting-it
https://www.michelebologna.net/2020/encrypt-an-existing-linux-installation-with-zero-downtime-luks-on-lvm/
https://dev.to/goober99/encrypt-an-existing-linux-installation-online-with-the-magic-of-lvm-1mjc
https://linuxconfig.org/how-to-use-luks-with-a-detached-header
https://medium.com/@privb0x23/lose-your-head-attempting-to-boot-from-luks-without-a-header-2d61174df360
https://askubuntu.com/questions/1351911/what-does-regenerate-your-initramfs-mean
https://superuser.com/questions/111152/whats-the-proper-way-to-prepare-chroot-to-recover-a-broken-linux-installation
https://unix.stackexchange.com/questions/720202/detached-luks-header-on-debian-based-gnu-linux

External and redundand Azure VM backups with Veeam to remote site

Backup is a must. Primary hardware fails. Local backups can also fail or can be inaccessible. Remote backups can also fail, but if you have 2, 3 or even more backup copies in different places and on various medium chances are high enough that you will survive major incidents without data loss or too much of being offline.

Talking about Microsoft Azure public cloud platform. But in case of any infrastructure environment you should have working and verified backup tools. Azure has its own. To keep those backups in secure remote place (in the context of Storage Account) you can use Veeam Backup for Microsoft Azure which can be used with up to 10 instances for free, besides costs of storage and VM to Veeam itself of course.

Source: Veeam Backup for Microsoft Azure Free Edition

To deploy Veeam you can use VM template from Azure’s marketplace. Its called “Veeam Backup for Microsoft Azure Free Edition”. You need to have also a storage account. I recommend setting it up with firewall enabled, configuring remote public IP address. This is the place where your VM backups made by Veeam will go.

Unlike Veeam Backup and Replication Community Edition, this one comes with browser-based user interface. It looks also quite differently from desktop-based version. What you need to do first is to define backup policy (Managment – Policies), add virtual machines and run it. That’s all at this point.

Resources covered with this policy can be found in Management – Protected Data. During backup, Veeam spins additional VM with Ubuntu template to take this backups. After backup or snapshot job is completed this temporary VM are gone.

As mentioned earlier, there are 10 slots within this free license. But you need to manually configure license usage which is a little bit annoying of course. Keep in mind that at least one backup or snapshot uses license seat. Need to remove to free it up.

You could use Veeam as a replacement for native backups coming from Azure. In this this proposed scenario, Veeam backups and the first step for having redundant and remote backups in case of environment inaccessibility.

Remote: Veeam Backup and Replication Community Edition

In order to move backups/snapshots from Azure Storage Account created by Veeam for Microsoft Azure you need to have Community Edition of Veeam installed in remote place. For sake of compliance it is necessary that it should be physically separate place and in my opinion it must not be the same service provider. So your remote site could be also on public cloud but from different provider.

In order to install Veeam Community you need to obtain Windows license for your virtual machine. Install Windows from official ISO coming from Microsoft and buy license directly from Microsoft Store. This way you can purchase electronic license even for Windows 10 which sometimes if preferable over Windows 11. Veeam installation is rather straight forward.

There is variaty of choise from where you can copy your backups. Which means that the similar setup can be done in other public clouds like AWS of GCP. In case of Microsoft Azure you need to copy you access token for Storage Account with backups from Azure Portal. Adding external repository can be done at Backup Infrastructure – External Repositories.

You need to have also a local repository which can be a virtual hard drive added to your Veeam Community VM and initialized with some drive letter in Windows.

There is a choice what to backup or have to transfer it to remote place. In this given scenario the optimum is to create Backup Copy which will immediately copy backups from the source as soon as they appear over there. Other scenarios are also possible but when additional requirements are met.

Once you have defined Backup Copy Job, run it. When completed you will have your source backup secured in remote place. Now you have copy those backups to different medium.

How to restore backups to remote Proxmox server?

Now you have your source backups secured and placed in remote site. The question arise, how to restore such backup? You could run instant recovery but to do this you need to have a commercial virtualization platforms set up. There is Proxmox on that list. However you can Export content as virtual disk, which will produce VMDK files with disk descriptors.

There is however one quirk you need to fix before continuing. Disk descriptors exported by Veeam are incompatible with disk import in Proxmox. Surround createType variable with quotes.

createType="monolithicFlat"

Copy disks exported to Proxmox server. Now you can create empty VM, ie. without disk drives and possibly event network adapters at first glace. Import disk into this newly created VM with qm utility. Then add drive to VM and change its boot order. You are good to go.

To recap the those procedure:

  • Export content as virtual disks
  • Fix createType variable in disk descriptor
  • Copy disk to Proxmox server
  • Create empty VM
  • Import disks into new VM
  • Configure VM and run it

Keep in mind that redundant backup is a must.

Recovering Proxmox VM from failed HDD

Due to previous failure of SSD drive from Goodram I was forced to use brand new 1TB HDD from Toshiba. It was not a problem because the system running on it mainly have been using writes with not too much reads. My SSD drive had some performance drops which could be because of the fact being run out of the same power socket shared with some DIY tools in garage. Now there is no power socket sharing I think that I may close server lid with too much force, so even brand new HDD failed.

Proxmox reported failure of disk access directly on the virtual machine:

Drive disappeard from the server. I remount it and rebooted still with no avail. I cleaned connections a little bit. Blow on vent hole on the drive. All that without success. So I used my LogiLink adapter to connect this drive to my workstation. Drive spun which means that it is somehow mechanically working.

I connected the drive to another Proxmox server thru USB and then magically it popped up being available again.

Quick look on SMART values and no disaster found here. Especially no read errors and no reallocations. So it might be that the drive itself is fine although file system is struggling inside.

So, the thing is then to use testdrive utility to read raw files from the drive regardless of what problems with partition table there are. We can check partition scheme with parted, fdisk and few other similar tools.

Just run testdrive (or install with apt install testdrive):

Select failed drive:

Select partition table type:

Analyze:

Press P to list files:

Now you can navigate thru filesystem. In my case it is possible as the drive itself seems to be almost fine and the problem is within filesystem. In other cases like drive drops and weird noise coming out of it – your milage may vary on success level factor.

Having qcow files holding your VM disk image you can then import it to another VM created without disk:

qm importdisk VIMD FILE DATASTORE

Remember to run datastore in at least mirrored setup (with md or zfs) and have proper backup. Although I had here some backups, I decided to give a try of recoving thoses files as it might be a lesson learned for the future real world cases.

Seperate Proxmox node from cluster

In order to separate Proxmox node from cluster:

systemctl stop pve-cluster
systemctl stop corosync
pmxcfs -l
rm /etc/pve/corosync.conf
rm -r /etc/corosync/*
killall pmxcfs
systemctl start pve-cluster
pvecm expected 1
rm /var/lib/corosync/*

Nested virtualization on Proxmox 7.4

If you would like to run virtual machine inside another virtual machine, then you need to have CPU with nested virtualization feature and this feature needs to be enabled. Even if enabled:

cat /sys/module/kvm_intel/parameters/nested  # Intel
cat /sys/module/kvm_amd/parameters/nested    # AMD

you might still have error on enabling virtualization inside virtual machine:

sudo modprobe kvm_intel
modprobe: ERROR: could not insert 'kvm_intel': Operation not supported

Still, even with “KVM hardware virtualization” set to Yes on VM Options pane in Proxmox UI, you may have trouble to get it to work. In case of Intel Xeon Gold 5412U there are no additional CPU flags available to set from Proxmox UI.

You need to select CPU type as “host” either from UI or inside VM configuration file (/etc/pve/qemu-server/XXX.conf). With this setting you get nearly all the features available and possible to pass from the host to guests.

Proxmox LXC backup with exit code 11

In case you have some LXC containers on your Proxmox server, then there is high chance that you will get some errors during backup them up. Some container templates may not support snapshot or suspend modes. Instead you should you use stop mode. It is important to remember that during such backup container will be stopped, so be aware of that in case you have some encryption which could ask for a key during startup.