Bash controlled Raspberry Pi 3B relay hat

If you would like to control some electrical devices by switching them on and off then one possiblity is to use Rasberry Pi relay hat. It is from Waveshare/Botland and it fits on top of your Raspberry Pi. It contains 3 relays controllers with screw connectors.

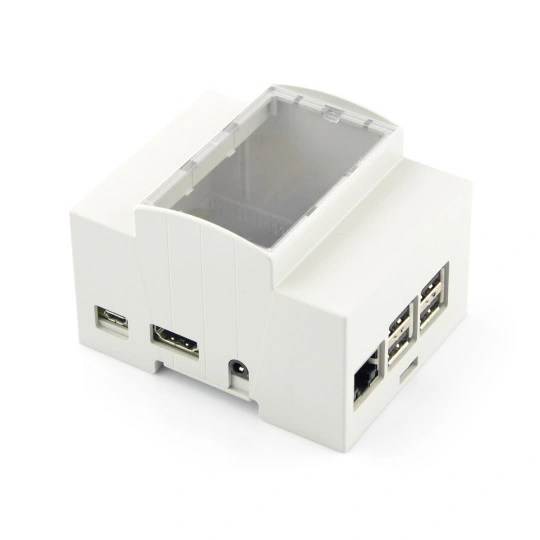
Once you wire your devices you can even put it within DIN box like this one below. Be sure to be careful inserting micro SD card as this box fits tight and you can easily break card apart like I once did.

In order to control relay connectors first you export pins:

echo '20' > /sys/class/gpio/export
echo '21' > /sys/class/gpio/export
echo '26' > /sys/class/gpio/export

Then you set pin direction:

echo 'out' > /sys/class/gpio/gpio20/direction
echo 'out' > /sys/class/gpio/gpio21/direction
echo 'out' > /sys/class/gpio/gpio26/direction

And finally initialize relay state to switched off:

echo 1 > /sys/class/gpio/gpio20/value
echo 1 > /sys/class/gpio/gpio21/value
echo 1 > /sys/class/gpio/gpio26/value

You can change logic settings on board using jumpers. I have tested this setup 12V wiring but it is possible to have lower or even higher voltages. Also many devices require only to close loop without any current draw.

To expose your Raspberry Pi to network (for further control from OpenHAB for instance) you can set up simple HTTP server using Ruby and Sinatra library.

sudo apt update
sudo apt install git ruby
sudo gem install sintara
require 'sinatra'
set :bind, '0.0.0.0'
get '/open' do
	system("echo 0 > /sys/class/gpio/gpio21/value")
	sleep 28
	system("echo 1 > /sys/class/gpio/gpio21/value")
	return 'Opened & Closed' 
end

To run:

ruby server.rb -o 0.0.0.0

Configure outgoing mail on Redash

Installing Redash is straightforward if you use https://github.com/getredash/setup repository. Just run setup script to download, install and configure all required packages. But there is one thing missing from the default. It is mail configuration. First install Redash with all default settings and then edit /opt/redash/env file:

REDASH_MAIL_SERVER
REDASH_MAIL_PORT
REDASH_MAIL_USERNAME
REDASH_MAIL_PASSWORD
REDASH_MAIL_DEFAULT_SENDER
REDASH_USE_TLS = true
REDASH_USE_SSL = false
REDASH_HOST

After setting those values run docker-compose up -d command to recreate containers. Use TLS and local IP address if you host your mail server on-premise. Now you should be able to send mail messages from your Redash.

Private Docker Registry with pfSense-offloaded TLS connections

Benefit from running your own docker registry is cost and privacy. But in order to use it in various places you need to secure its connection with SSL/TLS certificates. In case you have only ZeroSSL or LE certificates it can be difficult to maintain both you certificate at ACME/HAProxy leve in pfSense and secondary also in docker registry somewhere else.

Fortunately there is solution for that.

Add your docker registry domain to ACME certificate enrollment as usual. Run docker registry without giving it certificate. Instead configure a domain pointing at pfSense, preferably using non-WAN address. Next configure proxy-pass at Nginx level:

server {
  listen 80; 
  server_name registry.somedomain.com;
  ignore_invalid_headers off;
  client_max_body_size 0;
  proxy_buffering off;
 
  location / {
    access_log  /var/log/nginx/registry-somedomain-com.log;
    proxy_set_header Host $http_host;
    proxy_set_header X-Real-IP $remote_addr;
    proxy_set_header X-Forwarded-For $proxy_add_x_forwarded_for;
    proxy_set_header X-Forwarded-Proto https;
    chunked_transfer_encoding off;
    proxy_pass http://a.b.c.d:5000/;
  }
}

Most important part of it is to set X-Forwarded-Proto to https. Now you can use docker registry which runs locally and forget about setting up certificate renewal at registry level itself.

Proxmox LXC backup with exit code 11

In case you have some LXC containers on your Proxmox server, then there is high chance that you will get some errors during backup them up. Some container templates may not support snapshot or suspend modes. Instead you should you use stop mode. It is important to remember that during such backup container will be stopped, so be aware of that in case you have some encryption which could ask for a key during startup.

Germany BSI abuse message prevention

In case of an Abuse message from BSI (in Germany), the following services must be enabled and disabled:

systemctl disable rpcbind.target
systemctl disable rpcbind.socket
systemctl disable rpcbind.service
systemctl stop rpcbind.target
systemctl stop rpcbind.socket
systemctl stop rpcbind.service

Verify in 2 ways:

rpcinfo -T udp -p 192.168.45.67

telnet 192.168.45.67 111

Cutting with DROP traffic by Suricata IPS is not sufficient, because not all possible traffic signatures on port 111 are used and in most cases this port can be enumerated.

Dual WAN with failover in pfSense

Once in a while there is outage in my main internet connection. In order to keep everything up and running (fortunately) we can setup secondary WAN over LTE connection. Start with connecting your device (e.g. LTE router) over ethernet cable to pfSense box. Then in pfSense itself go to System.Routing.Gateways and a secondary one. Be sure to first activate your secondary interface in Interfaces. You cannot have same monitor IP on both gateways so try to point at well known addresses. Then go to Gateway Groups and configure as follows:

At this point you should have both gateways up and running. You could try to simulate outage either by plugging out cable from the box or selecting “Mark gateway as down” on any of these gateways.

Proxmox 8 on Scaleway

Bare metal servers offered at Scaleway are at reasonable prices, which can be compared to those on Hetzner. You even get Proxmox installation by default contrary to Hetzner were you need to install Debian first. To setup Proxmox with one public IP anf pfSense with another one you need to order Flexible IP and request for virtual MAC address. Remember that on Scaleway’s flexible IPs gateway is fixed and it is 62.210.0.1. Then for the network configuration:

auto lo
iface lo inet loopback

auto eno1
iface eno1 inet manual

iface eno2 inet manual

auto vmbr0
iface vmbr0 inet manual
        address x.x.x.x/24
        gateway y.y.y.y
        bridge-ports eno1
        bridge-stp off
        bridge-fd 0
        pointopoint y.y.y.y
        hwaddress a:b:c:d:e:f
        up route add -net a.a.a.a netmask b.b.b.b gw y.y.y.y dev vmbr0
        up ip route add z.z.z.z/32 dev vmbr0
# PUBLIC

auto vmbr1
iface vmbr1 inet static
        address 10.0.0.1/8
        bridge-ports eno2
        bridge-stp off
        bridge-fd 0
# LAN

x.x.x.x is primary Proxmox public IP. y.y.y.y is its gateway (with a.a.a.a network with b.b.b.b netmask). z.z.z.z is then your secondary public IP (flexible IP) for pfSense firewall. As you can see, there are two network adapters, eno1 and eno2. First one (eno1) is used for public IPs and second one (eno2) is for internal network only. For some reason the same configuration as on Hetzner, concerning LAN networking, does not work, so there are few changes there over that configuration at Hetzner.

Almost private-only Proxmox cluster

If you wonder if it is possible to have private-only Proxmox cluster in Hetnzer, then the answer is yes, almost. Of couse you can order dedicated hardware to hide your boxes from public eyes, but if you are not going that way, then you can try other way.

  • Install the first Proxmox with public IP, VLAN na pfSense, as usual
  • Second step is to install another Proxmox also with public IP, set up everything you need and leave it only with VLAN deleting public IP configuration. In /etc/hosts you need to set VLAN address i reload network interface. After this you need to go to first box as number 2 is no longer available
  • From the first box create cluster and join the second box (from sandbox VM with VLAN)
  • In order to have internet connectivity from private-only boxes you need to setup its VLAN routing to the first box VLAN address

Configuration of the first box:

auto DEV
iface DEV inet manual

auto vmbr0
iface vmbr0 inet static
        address PUBLIC-IP/26
        gateway PUBLIC-GW
        bridge-ports DEV
        bridge-stp off
        bridge-fd 0
        pointopoint PUBLIC-GW
        up route add -net PUBLIC-NET netmask MASK gw PUBLIC-GW dev vmbr0
        up ip route add 2PUBLIC-IP/32 dev vmbr0
#PUBLIC

iface DEV.4xxx inet manual
auto vmbr4xxx
iface vmbr4xxx inet manual
        address 10.x.x.x/16
        bridge-ports DEV.4xxx
        bridge-stp off
        bridge-fd 0
        mtu 1400
#VLAN

Configuration of the second, private-only, box:

iface DEV.4xxx inet manual

iface DEV inet manual

auto vmbr4xxx
iface vmbr4xxx inet static
        address 10.x.x.x/16
        gateway PFSENSE-AT-1ST-BOX
        bridge-ports DEV.4xxx
        bridge-stp off
        bridge-fd 0
        mtu 1400
#VLAN

oc rsync takes down OKD master processes

It might sound a little weird, but that’s the case. I was trying to setup NFS mount in OKD docker registry (from this tutorial). During oc rsync from inside docker-registry container I found that OKD master processes are down because of heath check thinking that there is some connectivity problem. This arised because oc rsync does not have rate limiting feature and it I fully utilized local network then there is no bandwidth left for the cluster itself.

Few things taken out from logs (/var/log/messages):

19,270,533,120  70%   57.87MB/s    0:02:19  The connection to the server okd-master:8443 was refused - did you specify the right host or port?
Liveness probe for "okd-master.local_kube-system (xxx):etcd" failed (failure): member xxx is unhealthy: hot unhealthy result
okd-master origin-node: cluster is unhealthy

The starting transfer from docker-registry container is at the of 200MB/s. I’m not quite sure if network is actually capable of such speed. The problem is repeatable, after liveness probe is triggered, master, etcd and webconsole are restarted which could lead to unstable cluster. We should avoid it if possible. Unfortunately docker-registry container is a very basic one, without ip, ifconfig, ssh, scp or any utilities which could help with transfering out files. But…

  • you can check IP of the container in webconsole
  • you can start HTTP server python -m SimpleHTTPServer on port 8000
  • you can then download the file with wget x.x.x.x:8000/file.tar --limit-rate=20000k

It is really funny, that the container lacks basic tools, but got Python. Set rate in wget on reasonable level that the internal network will not be fully utilized. To sum up. I did not encounter such problem on any other environment, either bare-metal or virtualized so it might be related specially with Microsoft Azure SDN and how it behaves on such traffic load.