The nature of wireless networking is quite problematic because transmission goes over air and can be intercepted by anyone. Of course there is data packet stream encryption. But deauthentication frames are not encrypted and can be forged. It’s applicable to IEEE 802.11 standard. However if your device is capable of 802.11w standard amendment then the management frames are protected from forging, however in various devices this option is disabled by default even if they support it. In case of your device check manual for default settings. It’s worth enabling this option. Not enabling, and securing both stations and base stations can lead not only to service denial/disruption, but also opens way to few possible attacks like “evil-twin“.
How to
To identify network or device to disrupt you can use airodump-ng. It turns your network adapter into listening mode and scans nearby networks. To switch between stations or base stations mode press “a”. For realtime sorting press “r”. Last must know shortcut is “s” for sorting. Space bar pauses scanning.
ip addr # to look for yournetadapter
sudo airodump-ng yournetadapter -w capturefilename
Base stations, which are access points are identified by column BSSID. Stations, which are clients, shows in the second table below. You can choose to deauthenticate just with MAC address of an access point or ESSID, which is human readible name. You can also pick some stations from the the second table to direct a deauthentication attack more precisely.
For a deauthentication part of the procedure use aireplay-ng tool. Pass –deauth with number of frames to send. If targeting only access points then pass -a with MAC of BSSID. If you target also some stations, then pass -c with MAC of a station (client).
sudo aireplay-ng --deauth 100 -a BSSIDMAC -c STATIONMAC yournetadapter
With proper values passed, stations will be disconnected from access point so their wireless service will be disrupted. As mentioned before it applies only to devices without IEEE 802.11w extension, which is most of consumer network devices. For enterprises it is highly possible that they will have proper enhancements already enabled.
Afterword
With airodump-ng you can select particular wireless channel to scan. You can also identify networks without security enabled at all. With traffic capturing feature enabled you can intercept precious parts of authentication procedure so you could try to crack it offline.
As an optional tool for any wireless related activities I can recommend WIFiman for Android which does the job of network perimeter exploration.
To provide security in a network you can deploy IDS or IPS systems. The difference is on the second letter, D stands for detection and P for prevention. First you start a system in IDS mode and only then you configure it to become IPS system. Enabling Suricata in IPS mode from the start could be confusing. It is advisable to see what’s going on first on a network to be sure not to generate too many false-positive alerts and blocks.
Fig. Traffic diagram
Why IDS/IPS?
You may ask why do I need intrusion detection or prevention system. It is a valid question because you may not want to know what is going on in your network or what malicious traffic is hitting your servers. But if you care about your data especially, then you should have such a system. In certain scenarios it might help lowering bad quality traffic as well.
About pfSense itself
I’m a great fan of pfSense since I think 2017. I’ve been using packet filter before and have been looking for user interface. Fortunately I found pfSense to meet my requirements. It contains firewall and router by default but can be enhanced by various packages like HAProxy, OpenVPN or IPsec.
Suricata installation & configuration in IDS mode
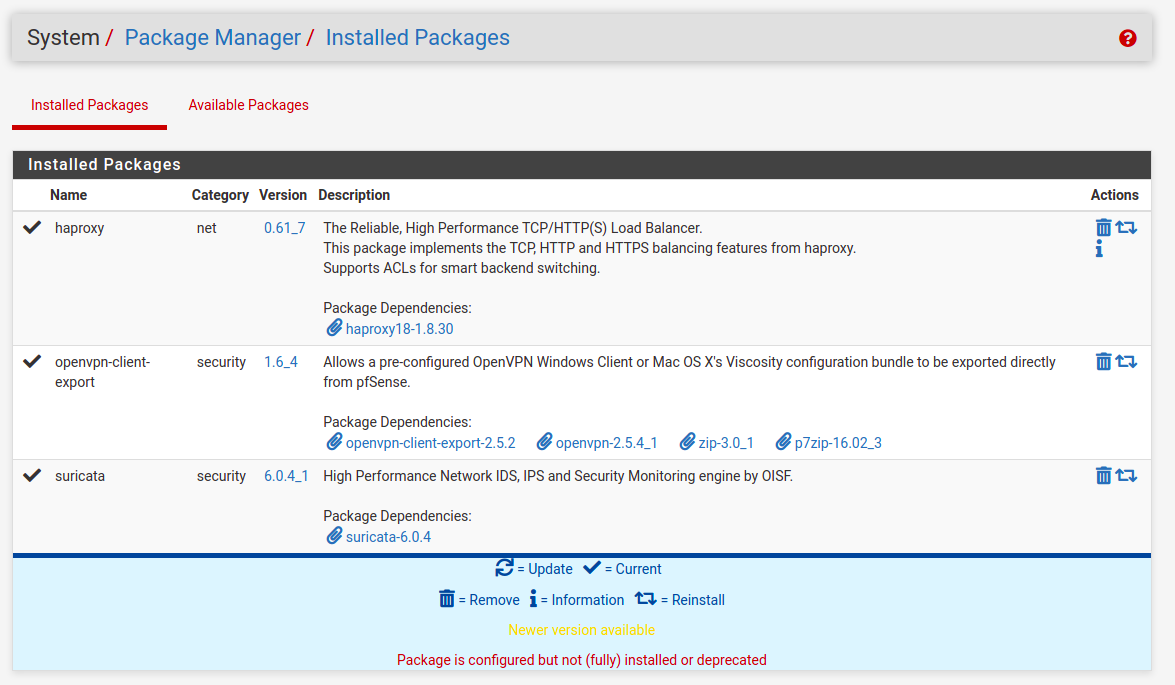
This IDS/IPS system can be installed as a standalone package without pfSense of cource, but it is especially useful when using together with firewall/router installation. The package can be found in pfSense’s package manager under System, Package Manager, Available Packages:
Fig. pfSense Package Manager
After installation, Suricata configuration page can be found under Services menu. You can with Global Settings first. Check “Install ETOpen Emerging Threats rules“, “Hide Deprecated Rules Categories”.
Fig. Rules download configuration
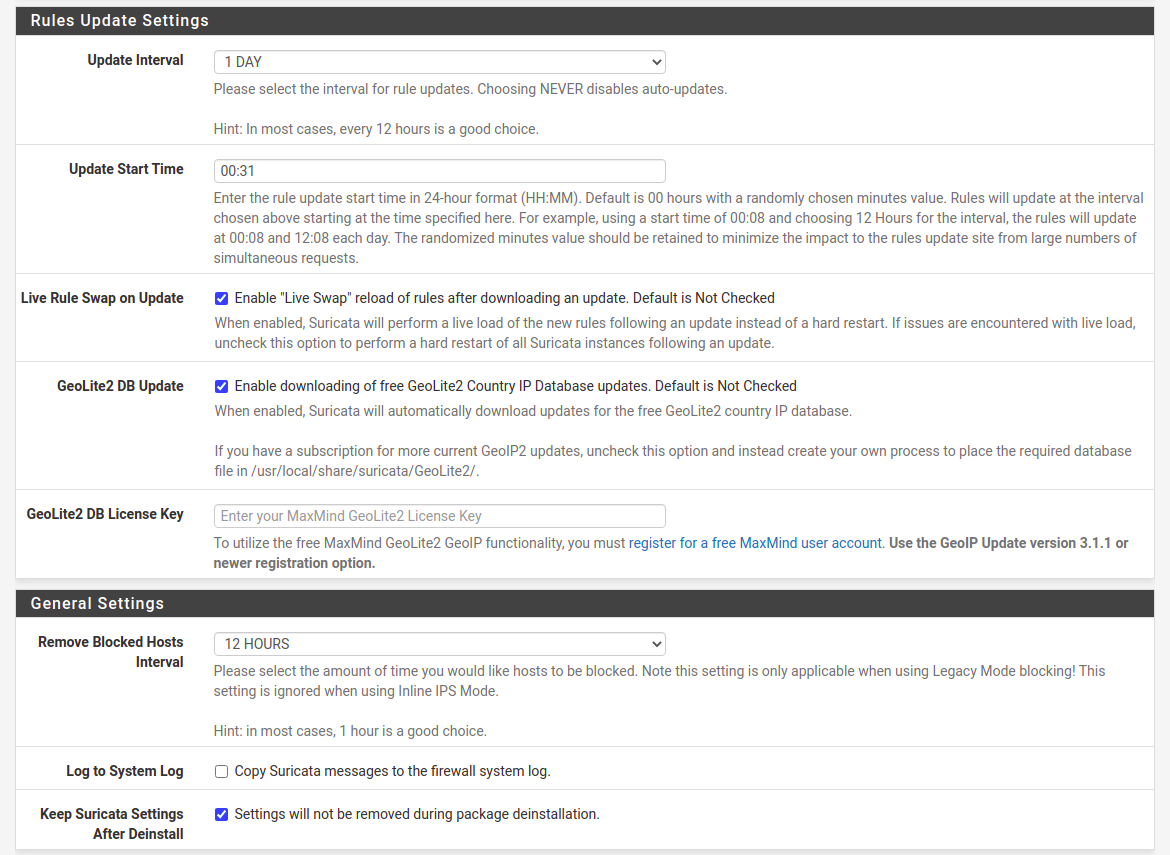
Below, select desired update frequency in “Update Interval” drop-down field. I select “1 DAY”. You can also check “Live Rule Swap on Update”, which will try to reload rules instead of just restart the service.
Fig. Frequencies configuration
For “Remove Blocked Hosts Interval” I select from 6 to 24 hours depending on the system specifics. Even if you will not start in IPS mode, be sure to check this at first configuration. It’s better to do this now instead of remembering to go back here after some time. You may just forget about it.
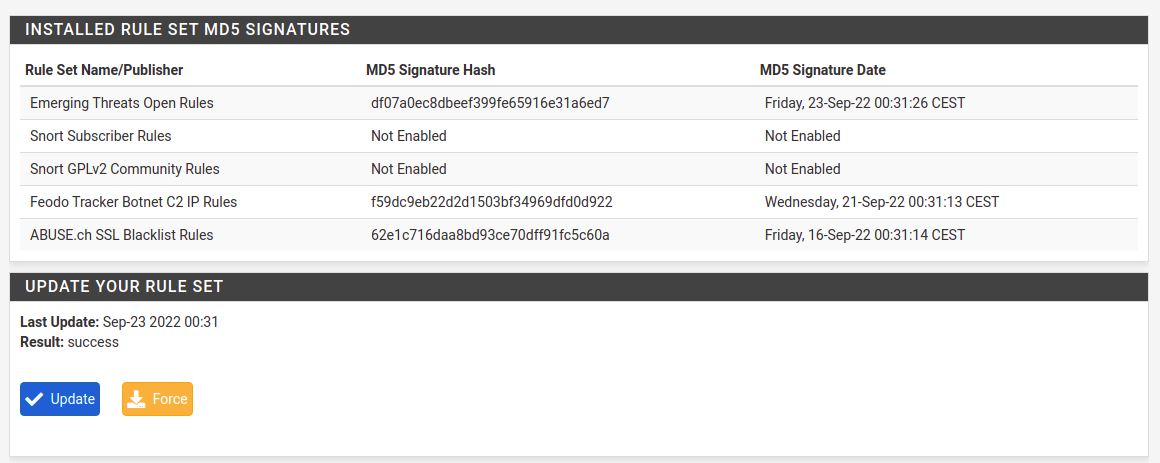
Next you need to force download rules in Updates tab. It does not trigger automatically for most of the time, so at first chance hit the Update button here.
Fig. Downloading rules
In case you have outdated pfSense installation there is high chance that the package will be outdated also and will try to download inexistent rules. It will end up with an error. I will not describe how to upgrade pfSense here, it will be covered in separate article. If rules download works just fine, then you’re fine, if it’s not, then prepare for some additional work.
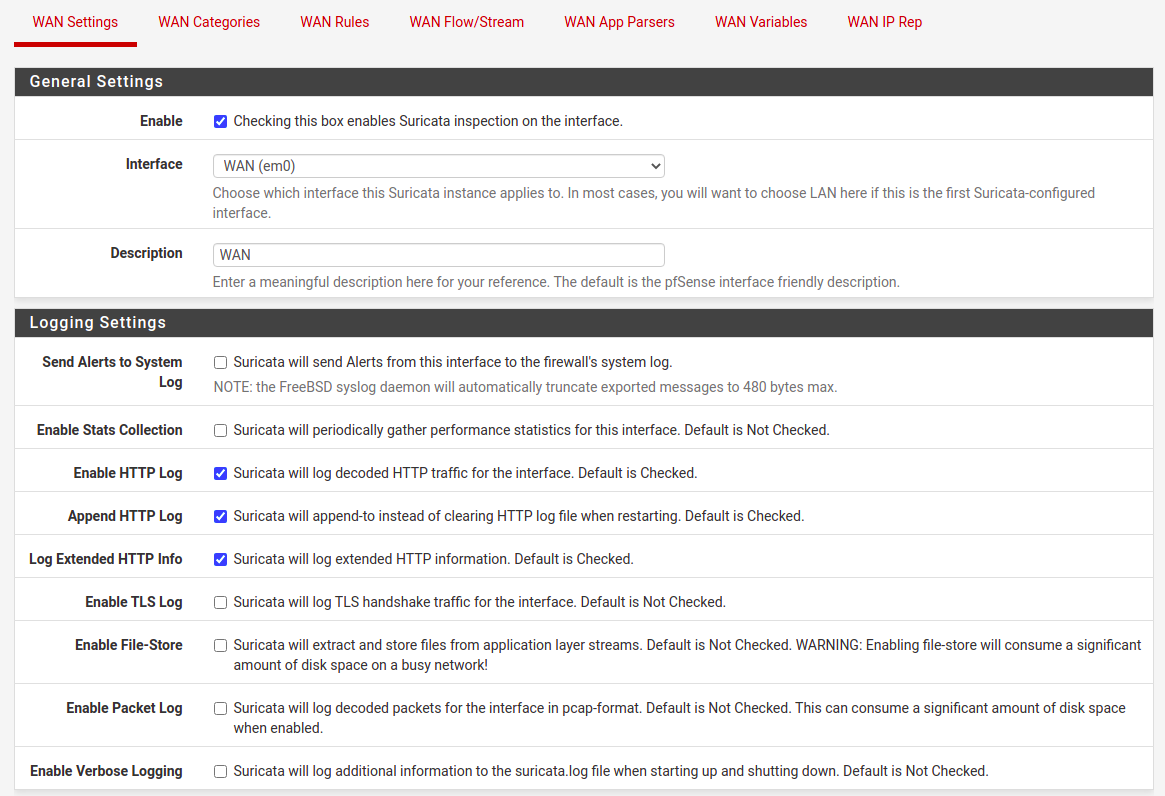
Next thing is to setup interface configuration. For to Interfaces tab and add an interface. There are few things to select there, starting with Enable checkbox if you want Suricata to run on this interface.
Fig. Interface general settings
You can try various options here for TLS, file-store and packet log. Except for TLS, the other onces, does require loads of disk space in a busy network. So remember to allocate enough storage here. There is one more thing in this section to configure, it is “Detect-Engine Profile”, which usually I set to “High” instead of default “Medium”. For now you do not select to block offenders, at first we stay as IDS intead of IPS mode.
For selecting only particular rules categories there is separate article (can be found under this link), so let me skip this one. For testing purposes I suggest enabling “3coresec”, “compromised” and “scan” rules categories. If done then go to Interfaces tab and restart Suricate on this interface. In case it is not starting, go to Logs View tab and browse suricata.log for some debugging information. Most of the time there is an issue with memory size versus configuration at Flow/Stream tab, but this is a subject for different article as well.
Enabling IPS mode
To prepare for prevention mode first go to Alerts tab and browse it for a while. Depending on a scenario you could spend 1 day or even a month just trying to understand what is going on your network/networks. For corporate networks there will be outgoing traffic more interesting that an incoming one. For service providers it is the opposite, so incoming traffic is the one to look after.
It is good to remember, that pfSense Suricata package will add your local network addresses, interfaces addresses and even tunnel subnets to pass list preventing them from blocking. In case you may want to block some internal addresses be sure to check this default pass list or even create your own one.
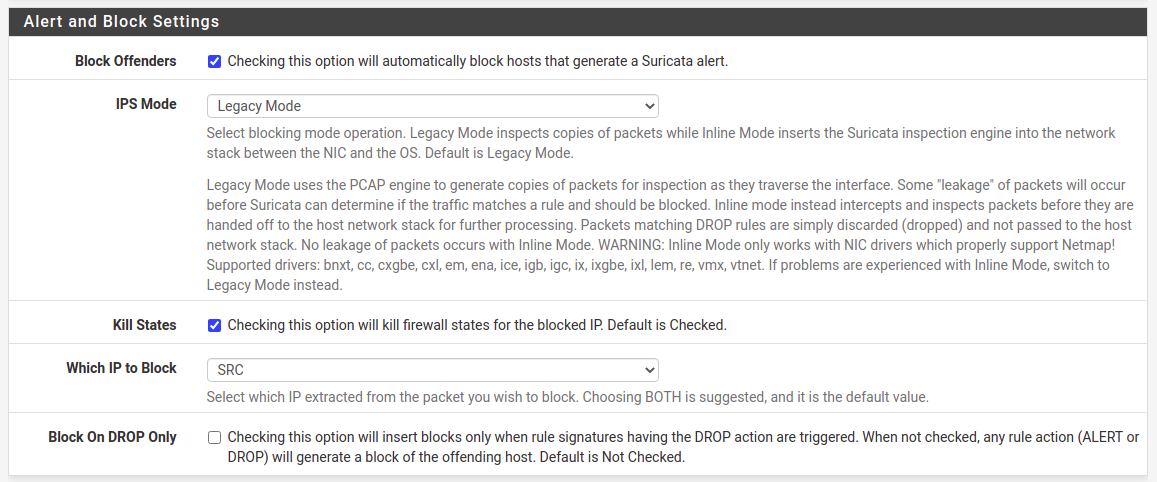
Once you have spent some time investigating what is going on within your network and incoming traffic as well, then it’s time to enable blocking mode. Go to interface settings and check “Block Offenders” option.
Fig. Enabling IPS mode, which blocks offenders
I prefer two things. First one is to select IPS Mode as “Legacy Mode” which copies packets instead of intercepting them between NIC and OS. It’s just simple for starters as there is little additional work to do opposite to “Inline Mode”. Second option I prefer is to block only source addresses, “Which IP to Block” set to “SRC”.
In case for outbound traffic a source address will be a local one, but it will not blocked because it is present on home network pass list. As I mentioned before, configuration depends on the characteristics of your networks you want to monitor. If you have more outgoing traffic then consider blocking target address. For some reason it is recommended to block both source and target, destination addresses. I am not sure exactly why as it clearly does not fit in all the cases.
Threats analysis
After configuration save, restart Suricata service on the interface and wait a while. Public IPv4 addresses are well known, so do not be surprised as within few minutes you will be scanned and explored by some kind of software crawlers. It is applicable even on newly assigned public addresses. For most installations I see from 50 to 500 blocked public addresses within one day of Suricata operating. For home and office networks you are going to see connectivity and updates checking from various devices. For enterprise setups traffic will be different and as it is broad topic it will be covered by another episode. So stay tuned.
I want to enable only particular rules categories. Do not want to have all these internal Suricate rules as they cover too broad variaty of cases including loads of false-positive. If one would like to go for deep traffic analysis then they would be fine, but in case you see “STUN Binding Request On Non-Standard High Port” and know that is your P2P camera in the LAN then it’s worth disabling all of that things at once. To disable them it is a little bit tricky on pfSense installation.
Go to Interfaces and selected desired one. Be sure to uncheck all snort or ET rules before. Then go to WAN Rules and select Active Rules in category dropdown box. Click Disable All. Now you are running without all default rules and can enable only those which you are interested most to have. For example you can try with the following: