E-mail Service Desk with self-hosted GitLab EE and iRedMail

In order to process incoming e-mail messages as issues registered in GitLab you need to have catch-all mailbox and GitLab configured to handle it. However, there are few quirks you need to know when setting it up.

Assuming you have GitLab installed as well as iRedMail.

iRedMail

First, create new mailbox in iRedMail admin panel. Then manually create forwarding record. You could skip this is you purchased iRedMail Pro:

INSERT INTO forwardings 
  (address, forwarding, domain, dest_domain)
VALUES 
  ('domain.com', 'catchall@domain.com', 'domain.com', 'domain.com');

At this point you can check if catch-all feature is working by sending mail to non existing mailbox user. What is especially important is to verify if messages will come once sent to catchall+something@domain.com address. At first they will appear as separate mailbox folders, which is no good from GitLab perspective. However it is easy to fix with removing extensions parameter from dovecot. So, change this:

dovecot unix    -       n       n       -       -      pipe
    flags=DRh ... -m ${extension}

to this one:

dovecot unix    -       n       n       -       -      pipe
    flags=DRh ...

And run /etc/init.d/postix restart

GitLab

As for GitLab itself it is straightforward. Just edit /etc/gitlab/gitlab.rb at incoming_email* parameters. You need to use IMAP however so choose between 143 ad 993 ports. First one is intended to use STARTTLS and second one is for TLS. In case of a default iRedMail installation there will be self-signed certificate and incoming email will not work which you can by the way with the following command:

sudo gitlab-rake gitlab:incoming_email:check

Once you fill in all the required parameters:

sudo gitlab-ctl reconfigure

Remember that all configuration you have changed in PostgreSQL will be discarded (/var/opt/gitlab/postgresql/data/pg_hba.conf and /var/opt/gitlab/postgresql/data/postgresql.conf) so need to take care of it either by templating it or placing in GitLab main configuration.

Get iRedMail certificate. You can grab it using browser. Save it as .crt file in /etc/gitlab/trusted-certs directory. After that reconfigure and check connectivity once again. You should be good to go.

How to operate?

In GitLab a service desk is enabled in all the projects created, automatically. You can find it Monitor – Service Desk. You will find there also a target email address to which you will be sending your service desk messages. Once mail is sent it will appear in this section as an issue. You can comment and reply thru email client directly without need to visit GitLab itself.

Encrypt with LUKS an unencrypted LVM Ubuntu 22 Server without system reinstallation

Keep your data safe. Device loss or unauthorized access can be mitigated by encrypting drive in your server and workstation.

So you may have a Ubuntu Linux installation on your bare metal or virtual machine. Does it have an encrypted drive? If the answer is no, then you could be in trouble when device is stolen or lost, or someone just gained unauthorized access to your hardware. In this short step-by-step article you can see what steps your should take to encrypt your unencrypted drives without need to reinstall the system.

When speaking workstation, there is much less concern about system reinstallation. Just move out your data, configuration in favourable time and proceed with clean system installation, now with proper drive encryption configured. But hold on a second. If there is option to encrypt without need to reinstall your system, then why just not try it?

It is especially important when talking about server installations running production software handling customers data. You can opt for system replacement in maintainance window and redo all your work. But, sometimes it is not a option. Actually it does not matter what kind of you unmaintained and obsolote software you run on your unencrypted servers. I think most of us know at least one example of such a thing. With such a problematic software it would better to just do it as-is without additional steps required.

How to migrate data?

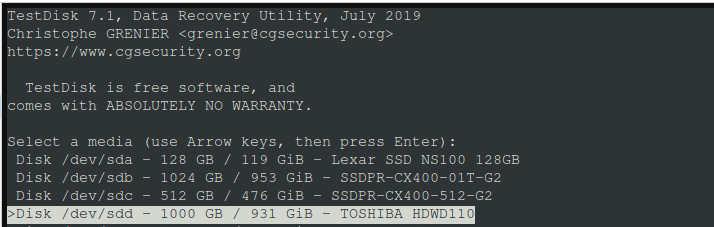
Here you can learn how to encrypt your existing data on LVM based drives in Ubuntu 22 server virtual machine. To get started you need to add additional drive to your system with equal or more space than on unencrypted drive. Lets say your source is at /dev/sda and your spare drive is at /dev/sdb. I assume that it is a default setup with 3 partitions. First one is for GRUB spacer, second for boot and thind for root filesystem.

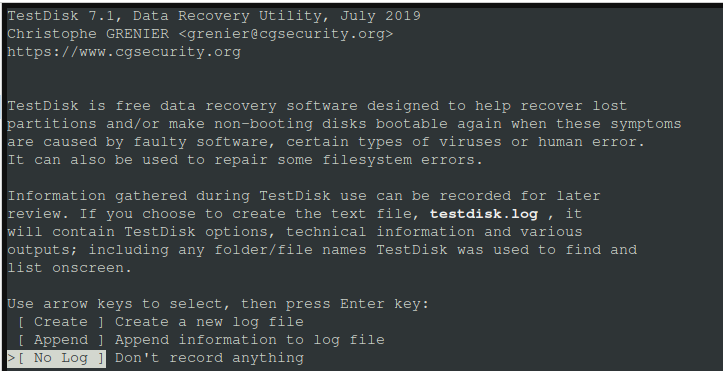
Boot your VM with GRML ISO. On Proxmox, when VM is starting, press Esc and select disc drive with ISO mounted.

Once booted into GRML…

Create PV and extend existing VG with new drive:

pvcreate /dev/sdb
vgextend ubuntu-vg /dev/sdb

Move your data to new drive:

pvmove /dev/sda3 /dev/sdb

Get rid of existing source unencrypted drive from VG and remove PV:

vgreduce ubuntu-vg /dev/sda3
pvremove /dev/sda3

Now it’s time to wipe existing unencrypted drive:

crypt setup open --type plain -d /dev/urandom /dev/sda3 to_be_wiped
dd if=/dev/zero of=/dev/mapper/to_be_wiped bs=1M status=progress
cryptsetup close to_be_wiped

Now the most important aspect of the procedure. Create mountpoint for boot and write a LUKS header over there. It is critical to save this header on permanent storage. If header with keys is lost then your data will be lost also. Keep this in mind:“`

mkdir /mnt/boot
mount /dev/sda2 /mnt/boot

Encrypt and open drive container:

cryptsetup -y luksFormat /dev/sda3 --header /mnt/boot/luksheader.img
cryptsetup luksOpen /dev/sda3 lvmcrypt --header /mnt/boot/luksheader.img

Create new PV and include it into existing VG.

pvcreate /dev/mapper/lvmcrypt
vgextend ubuntu-vg /dev/mapper/lvmcrypt

Move your data from additional spare drive into newly created lvmcrypt container:

pvmove /dev/sdb /dev/mapper/lvmcrypt

And finally, remove this new drive from VG and remove PV itself:

vgreduce ubuntu-vg /dev/sdb
pvremove /dev/sdb

How to update initramfs with detached LUKS2 header

So what is the deal with this LUKS2 header being detached. In this format, first 16MB of space is used for header. Once the original drive includes this space it will not have enough proper space for data which needs to be moved back again. The second reason to have detached header is to increase security level somehow. But remember that in case of loss of the device or filesystem holding it you permamently loose your data also. So…

If booting once again into GRML:

mkdir /mnt/luks
cryptsetup luksOpen /dev/sdb3 lvmcrypt --header /mnt/boot/luksheader.img
vgchange -ay
mount /dev/mapper/ubuntu--vg-ubuntu--lv /mnt/luks

If you continue without rebooting you can just create mountpoint directory and mount it:

mkdir /mnt/luks
mount /dev/mapper/ubuntu--vg-ubuntu--lv /mnt/luks

Mount and bind necessary special directories and then chroot into the system:

mount -t proc proc /mnt/luks/proc
mount -t sysfs sys /mnt/luks/sys
mount -o bind /dev /mnt/luks/dev
mount --bind /run /mnt/luks/run
mount /dev/sda2 /mnt/luks/boot
chroot /mnt/luks /bin/bash

Now you are back in your Ubuntu, in your encrypted drive. Is it over? No. We need to tell at boot time where there LUKS2 header is stored. Copy your header into any additional drive found. It case of VM it could be 0.1GB drive. In case of workstation it can be a USB pendrive:

dd if=/boot/luksheader.img of=/dev/sdb

Edit your /etc/crypttab file with the following:

lvmcrypt PARTUUID=A none luks,header=/dev/disk/by-uuid/B

where A is your blkid /dev/sda3 and B is your blkid /dev/sdb.

Finally, regenerate initramfs:

update-initramfs -c -k all
exit
reboot

You’re good to go. Now your drive is encrypted and you will be asked for password set earlier every time you boot the system. To be clear, you need to keep safe your additional drive holding the LUKS2 header. After you booted the system, the drive or pendrive can be removed, but it need to be inserted once again on every further reboots.

Further reading

https://unix.stackexchange.com/questions/444931/is-there-a-way-to-encrypt-disk-without-formatting-it
https://www.michelebologna.net/2020/encrypt-an-existing-linux-installation-with-zero-downtime-luks-on-lvm/
https://dev.to/goober99/encrypt-an-existing-linux-installation-online-with-the-magic-of-lvm-1mjc
https://linuxconfig.org/how-to-use-luks-with-a-detached-header
https://medium.com/@privb0x23/lose-your-head-attempting-to-boot-from-luks-without-a-header-2d61174df360
https://askubuntu.com/questions/1351911/what-does-regenerate-your-initramfs-mean
https://superuser.com/questions/111152/whats-the-proper-way-to-prepare-chroot-to-recover-a-broken-linux-installation
https://unix.stackexchange.com/questions/720202/detached-luks-header-on-debian-based-gnu-linux

External and redundand Azure VM backups with Veeam to remote site

Backup is a must. Primary hardware fails. Local backups can also fail or can be inaccessible. Remote backups can also fail, but if you have 2, 3 or even more backup copies in different places and on various medium chances are high enough that you will survive major incidents without data loss or too much of being offline.

Talking about Microsoft Azure public cloud platform. But in case of any infrastructure environment you should have working and verified backup tools. Azure has its own. To keep those backups in secure remote place (in the context of Storage Account) you can use Veeam Backup for Microsoft Azure which can be used with up to 10 instances for free, besides costs of storage and VM to Veeam itself of course.

Source: Veeam Backup for Microsoft Azure Free Edition

To deploy Veeam you can use VM template from Azure’s marketplace. Its called “Veeam Backup for Microsoft Azure Free Edition”. You need to have also a storage account. I recommend setting it up with firewall enabled, configuring remote public IP address. This is the place where your VM backups made by Veeam will go.

Unlike Veeam Backup and Replication Community Edition, this one comes with browser-based user interface. It looks also quite differently from desktop-based version. What you need to do first is to define backup policy (Managment – Policies), add virtual machines and run it. That’s all at this point.

Resources covered with this policy can be found in Management – Protected Data. During backup, Veeam spins additional VM with Ubuntu template to take this backups. After backup or snapshot job is completed this temporary VM are gone.

As mentioned earlier, there are 10 slots within this free license. But you need to manually configure license usage which is a little bit annoying of course. Keep in mind that at least one backup or snapshot uses license seat. Need to remove to free it up.

You could use Veeam as a replacement for native backups coming from Azure. In this this proposed scenario, Veeam backups and the first step for having redundant and remote backups in case of environment inaccessibility.

Remote: Veeam Backup and Replication Community Edition

In order to move backups/snapshots from Azure Storage Account created by Veeam for Microsoft Azure you need to have Community Edition of Veeam installed in remote place. For sake of compliance it is necessary that it should be physically separate place and in my opinion it must not be the same service provider. So your remote site could be also on public cloud but from different provider.

In order to install Veeam Community you need to obtain Windows license for your virtual machine. Install Windows from official ISO coming from Microsoft and buy license directly from Microsoft Store. This way you can purchase electronic license even for Windows 10 which sometimes if preferable over Windows 11. Veeam installation is rather straight forward.

There is variaty of choise from where you can copy your backups. Which means that the similar setup can be done in other public clouds like AWS of GCP. In case of Microsoft Azure you need to copy you access token for Storage Account with backups from Azure Portal. Adding external repository can be done at Backup Infrastructure – External Repositories.

You need to have also a local repository which can be a virtual hard drive added to your Veeam Community VM and initialized with some drive letter in Windows.

There is a choice what to backup or have to transfer it to remote place. In this given scenario the optimum is to create Backup Copy which will immediately copy backups from the source as soon as they appear over there. Other scenarios are also possible but when additional requirements are met.

Once you have defined Backup Copy Job, run it. When completed you will have your source backup secured in remote place. Now you have copy those backups to different medium.

How to restore backups to remote Proxmox server?

Now you have your source backups secured and placed in remote site. The question arise, how to restore such backup? You could run instant recovery but to do this you need to have a commercial virtualization platforms set up. There is Proxmox on that list. However you can Export content as virtual disk, which will produce VMDK files with disk descriptors.

There is however one quirk you need to fix before continuing. Disk descriptors exported by Veeam are incompatible with disk import in Proxmox. Surround createType variable with quotes.

createType="monolithicFlat"

Copy disks exported to Proxmox server. Now you can create empty VM, ie. without disk drives and possibly event network adapters at first glace. Import disk into this newly created VM with qm utility. Then add drive to VM and change its boot order. You are good to go.

To recap the those procedure:

  • Export content as virtual disks
  • Fix createType variable in disk descriptor
  • Copy disk to Proxmox server
  • Create empty VM
  • Import disks into new VM
  • Configure VM and run it

Keep in mind that redundant backup is a must.

BPMN process modeling with Bonita Studio

Building applications to do things better leads to operational excellence. And using digital tools and applications across the enterprise to do business differently – to enable innovation and creativity – leads to strategic advantage. When digital transformation tools are applied to the long-term vision and creativity of the enterprise, digital transformation becomes strategic.

Download Bonita Studio Community from https://www.bonitasoft.com/downloads. There is either zip package or installer available depending on your operating system. At the moment of this writing there Bonita Studio Community version 2023.02-u0.

TLDR

In this article you will see how to create project, organization and design sample BPMN process. Next you will see how to process cases and tasks by various defined and mapped users relaying only on comments, so no forms design needed. Forms design will be covered in another article.

Creating new project

In order to create new Bonita Studio project:

At this point you can also select additional extension. But for now I will skip that and just create a new project. As it is deployed on Java platform you need to give group ID and artifact name. Then first things first. Create new organization. By default new projects start with ACME sample organization. Select organization and then show file in file explorer and manually delete it. I suppose there is some other options to do this but in community versions it seems that we lack of such feature.

Configuring new organization

Organization comprises of groups, roles and users.

It is somehow required to have at least one group and role before creating new user. Next, deploy project from menu and not from organization pane which will not work (for some unknown reason). You need to put default username.

For my Ubuntu installation opening application from this dialog will not work.

Accessing applications

Now lets talk a little about how to access applications. You have few options. First there is Bonita Super Administrator Application at 127.0.0.1:8080/bonita signing in as install user with the same password.

This super administrator application thing should be use to proceed with maintenance changes, managing data model (only one can be active at a time) etc. However signing in as a different, regular user created just moments before gives us slightly different view with one additional application.

This user application allows you to work with process cases based on processes you will create in your project.

UI Designer

One more thing available using browser is a designer thing for creating and configuring pages and forms. This application can be reached at port 8081 instead of port 8080 for beforementioned applications.

Designing sample process

Bonita Studio allows you to design and deploy functional instances of BPMN processes.

For sake of case management it is important to keep track of your process versioning. It is directly linked with processing cases. Every another version of your process should get new version number which will be reflected on available cases to start by regular users. For now we just set default 1.0 version.

Now it is time to configure user mapping for the process. I start with unmapping sample ACME groups. It can be done from Configure dialog available on main menu. In addition to that I provide some new mapping instead.

I also add additional users for sake of an example here.

In order to work with configuring process I deploy the whole project once again to apply organization and user changes.

Sample process looks like this:

Configuring process

Aside from process BPMN notation there is need to setup instantiation form and overview page. For sample process I set it to No form.

Even without those forms you will be able to provide commets on task cases. I set No form also on every process steps. It can be done on Execution pane. On general pane you can setup actors which is user that can interact with this particular process step.

For now and this sample process I think it is enough to start playing with it. Last thing is to deploy the whole project once again.

Initating cases based on BPMN process

Now with project deployed, which is organization and process you can sign in as a User1. This user is within MyMapping kinda-group which maps to User1 and User2 from organization. As you can see User1 can initiate process case.

User2 can also initiate new process named Pool.

However User3 which is in different group cannot initiate new process. Which is exactly how I configure it.

Processing cases

Users placed as initiating actors can start a case. Users placed in mapping in first step can take cases for processing.

As User1 is in the same mapping as User2 (initiator), User1 can take this case at this point.

In order to place a comment you need to “take” a case. Case that is taken by a user will be seen on its Tasks list. Other users from the same mapping will see it on Cases list as there are no work to be done for other users and this work is directed to this user which took it for further proceeding.

Once User1 placed a comment a this task is no longer available as it is done. User1 and User1 (both in the same mapping) can see this case in Cases list.

User can also review all the comments history on case preview page.

At this moment User3 can take Step2 task, according to our BPMN process made before. Users which participated, i.e fill forms, left comments etc, can see those cases in Cases list. Cases that went thru all its steps go to Archived cases list.

Recovering Proxmox VM from failed HDD

Due to previous failure of SSD drive from Goodram I was forced to use brand new 1TB HDD from Toshiba. It was not a problem because the system running on it mainly have been using writes with not too much reads. My SSD drive had some performance drops which could be because of the fact being run out of the same power socket shared with some DIY tools in garage. Now there is no power socket sharing I think that I may close server lid with too much force, so even brand new HDD failed.

Proxmox reported failure of disk access directly on the virtual machine:

Drive disappeard from the server. I remount it and rebooted still with no avail. I cleaned connections a little bit. Blow on vent hole on the drive. All that without success. So I used my LogiLink adapter to connect this drive to my workstation. Drive spun which means that it is somehow mechanically working.

I connected the drive to another Proxmox server thru USB and then magically it popped up being available again.

Quick look on SMART values and no disaster found here. Especially no read errors and no reallocations. So it might be that the drive itself is fine although file system is struggling inside.

So, the thing is then to use testdrive utility to read raw files from the drive regardless of what problems with partition table there are. We can check partition scheme with parted, fdisk and few other similar tools.

Just run testdrive (or install with apt install testdrive):

Select failed drive:

Select partition table type:

Analyze:

Press P to list files:

Now you can navigate thru filesystem. In my case it is possible as the drive itself seems to be almost fine and the problem is within filesystem. In other cases like drive drops and weird noise coming out of it – your milage may vary on success level factor.

Having qcow files holding your VM disk image you can then import it to another VM created without disk:

qm importdisk VIMD FILE DATASTORE

Remember to run datastore in at least mirrored setup (with md or zfs) and have proper backup. Although I had here some backups, I decided to give a try of recoving thoses files as it might be a lesson learned for the future real world cases.

Create own shorcut icon in Ubuntu 22 panel

If you want to run some curl on icon click from Ubuntu 22 panel, then you need to create file in ~/.local/share/applications:

[Desktop Entry]
Encoding=UTF-8
Version=1.0
Type=Application
Terminal=false
Exec=curl http://x.x.x.x:yyyy/action
Name=Gateway
Icon=dialog-information

Then after few seconds, press special key (aka Windows key) and type your “application” name. You can grab and paste it onto application panel to be shown as a shortcut.

chromium downloader for MacOS 10.8.5

If you happen to have MacBookPro3,1 with Intel Core 2 Duo 2.2Hz DDR2 SDRAM with MacOS 10.8.5 on board then you probably wonder if there is a chance to access internet with modern browser. Yes, now you can with chromium downloader for chromium-legacy.

https://github.com/blueboxd/chromium-legacy

https://github.com/blueboxd/chromium-legacy/discussions/25

However there are reported some issues with NVIDIA GeForce 8600M GT 128MB GPU and I can confirm it also. If you download the latest, as for now 121, Chromium will be installed but no visible window content could be seen. Instead I downloaded stable 114 version which run just fine. Probably you could run more recent version but put some additional settings regarding GPU.

Few words about Chromium 114 itself. It run just fine, but it makes MacBook struggle a little bit, it gets extremely hot. I even wonder if it would get on fire 🙂

Seperate Proxmox node from cluster

In order to separate Proxmox node from cluster:

systemctl stop pve-cluster
systemctl stop corosync
pmxcfs -l
rm /etc/pve/corosync.conf
rm -r /etc/corosync/*
killall pmxcfs
systemctl start pve-cluster
pvecm expected 1
rm /var/lib/corosync/*

Nested virtualization on Proxmox 7.4

If you would like to run virtual machine inside another virtual machine, then you need to have CPU with nested virtualization feature and this feature needs to be enabled. Even if enabled:

cat /sys/module/kvm_intel/parameters/nested  # Intel
cat /sys/module/kvm_amd/parameters/nested    # AMD

you might still have error on enabling virtualization inside virtual machine:

sudo modprobe kvm_intel
modprobe: ERROR: could not insert 'kvm_intel': Operation not supported

Still, even with “KVM hardware virtualization” set to Yes on VM Options pane in Proxmox UI, you may have trouble to get it to work. In case of Intel Xeon Gold 5412U there are no additional CPU flags available to set from Proxmox UI.

You need to select CPU type as “host” either from UI or inside VM configuration file (/etc/pve/qemu-server/XXX.conf). With this setting you get nearly all the features available and possible to pass from the host to guests.