These are two majors which allow to run object detection models. Google Coral TPU is a physical module which can be in a form of USB stick. TensorRT is a feature of GPU runtime. Both allows to run detection models on them.
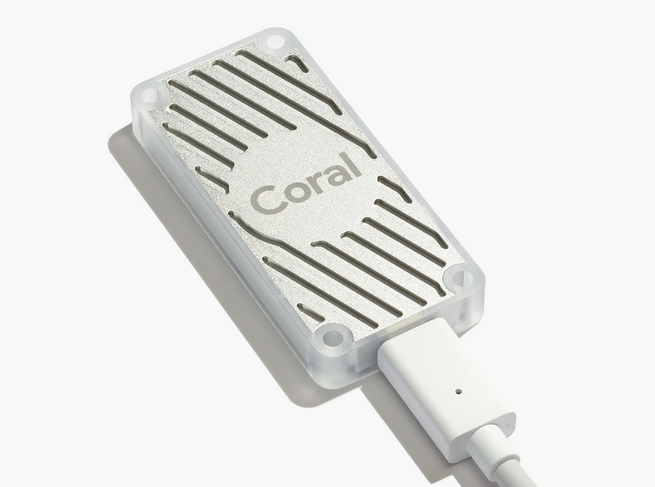
Coral TPU:
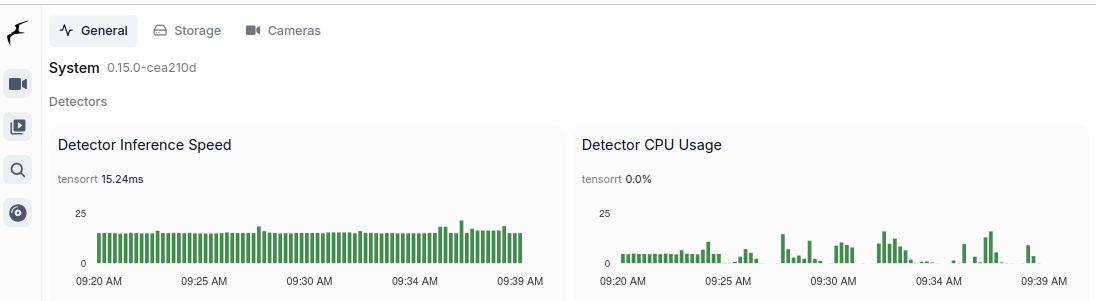
And TensorRT:
Compute Capabilities requirements
CC 5.0 is required to run DeepStack and TensorRT, but 7.0 to run Ollama moondream:1.8b. Even having GPU with CC 5.0 which is minimum required to run for instance TensorRT might be not enough due to some minor differences in implementation. It is better to run on GPU with higher CC. Moreover running on CC 5.0 means that GPU is older one which leads to performance degradation even as low as having 2 or 3 camera feeds for analysis.
Running TensorRT detection models (popular ones) requires little VRAM memory, 300 – 500 MB but it requires plenty of GPU cores and supplemental physical components to be present in such GPU, with high working clocks. In other words, you can fit those models in older GPUs but it will not perform well.
Other side of the story is to run Ollama which is GenAI requiring CC 7.0 and higher. Ollama with moondream:1.8b which is the smallest available detection model still requires little more than 3GB of VRAM.
TensorRT on Geforce MX940
You can run TensorRT object detector from Frigate on NVIDIA Geforce 940MX with CC 5.0, but it will get hot at the same time you launch it. It run on driver 550 with CUDA 12.4 as follows on only one camera RTSP feed:
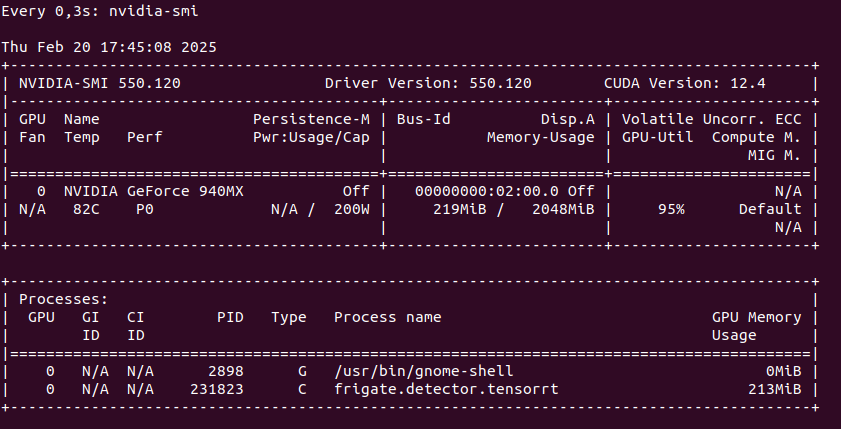
So this is not an option as we may burn this laptop GPU quickly. Configuration for TensorRT:
detectors:
  tensorrt:
    type: tensorrt
    device: 0

model:
  path: /config/model_cache/tensorrt/yolov7-320.trt
  input_tensor: nchw
  input_pixel_format: rgb
  width: 320
  height: 320
To start Docker container you need to pass YOLO_MODELS environment variable:
docker run -d \
  --name frigate \
  --restart=unless-stopped \
  --stop-timeout 30 \
  --mount type=tmpfs,target=/tmp/cache,tmpfs-size=1000000000 \
  --shm-size=1024m \
  --device /dev/bus/usb:/dev/bus/usb \
  --device /dev/dri/renderD128 \
  -v ./frigate-media:/media/frigate \
  -v ./frigate-config:/config \
  -v /etc/localtime:/etc/localtime:ro \
  -e FRIGATE_RTSP_PASSWORD='password' \
  -e YOLO_MODELS=yolov7x-640 \
  -p 8971:8971 \
  -p 8554:8554 \
  -p 8555:8555/tcp \
  -p 8555:8555/udp \
  --gpus all \
  ghcr.io/blakeblackshear/frigate:stable-tensorrt
Pleas notice that Docker image is different if you want to run use GPU with TensorRT than without it. It is also not possible to run hardware accelerated decoder using FFMPEG with 940MX so disable it by passing empty array:
cameras:
  myname:
    enabled: true
    ffmpeg:
      inputs:
        - path: rtsp://user:pass@addr:port/main
          roles:
            - detect
            - record
      hwaccel_args: []
However if you would like to try hardware decoder with different GPU or CPU the play with this values:
preset-vaapi
present-nvidia
TensorRT on “modern” GPU
It is the best to run TensorRT on modern GPU with highest possible CC feature set. It will run detection fast, it will not get hot as quickly. Moreover it will have hardware support for video decoding. And even more you could run GenAI on the same machine.
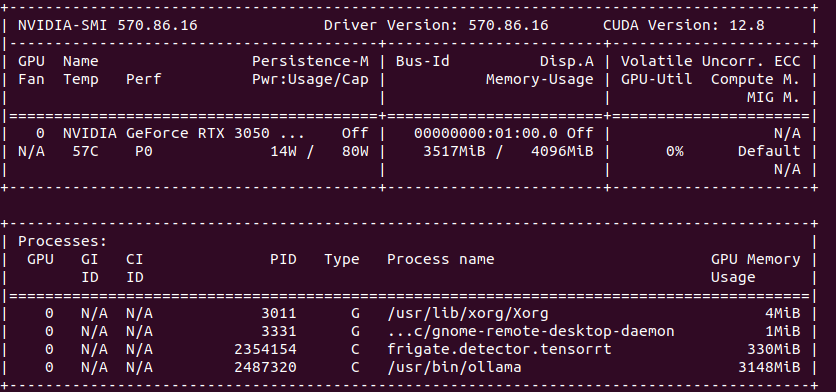
So the minimum for object detection with GenAI descriptions is to have 4 GB VRAM. In my case it is NVIDIA RTX 3050 Ti Mobile which runs 25% at most with 4 – 5 camera feeds.
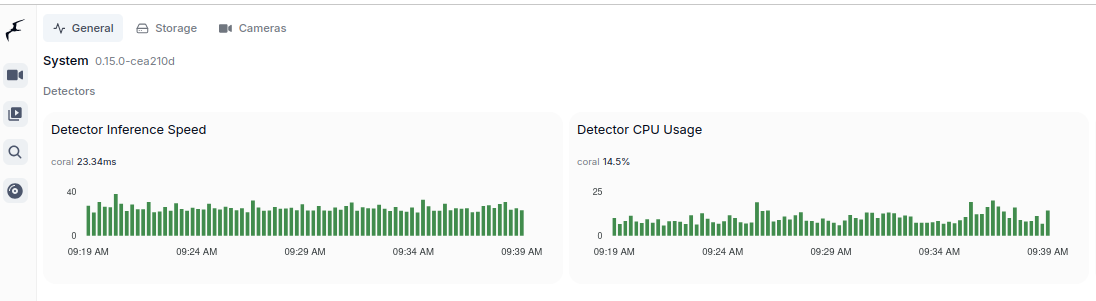
Google Coral TPU USB module
To run Coral detector:
detectors:
  coral:
    type: edgetpu
    device: usb
But first you need to install and configure it:
sudo apt install python3-pip python3-dev python3-venv libusb-1.0-0
echo "deb https://packages.cloud.google.com/apt coral-edgetpu-stable main" | sudo tee /etc/apt/sources.list.d/coral-edgetpu.list
curl https://packages.cloud.google.com/apt/doc/apt-key.gpg | sudo apt-key add -
sudo apt update
sudo apt install libedgetpu1-std
You can also run TPU in high power mode:
sudo apt install libedgetpu1-max
And finally configure USB:
echo 'SUBSYSTEM=="usb", ATTR{idVendor}=="1a6e", GROUP="plugdev", MODE="0666"' | sudo tee /etc/udev/rules.d/99-edgetpu-accelerator.rules
sudo udevadm control --reload-rules && sudo udevadm trigger
Remember to run Coral via USB 3.0 as running it via USB 2.0 will cause performance drop by a factor of 2 or even 3 times. Second thing, to run Coral, first plug it in. Wait until it is recognized by the system:
lsusb
At first you will see not Google, but 1a6e Global Unichip. After TPU is initialized you will see 1da1 Google Inc:

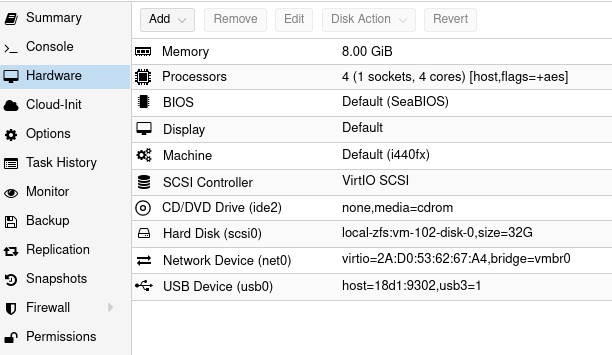
You can pass Coral TPU via Proxmox USB device, but after each Proxmox restart you need to take care of TPU initialization: