PV production metering using Huawei API integrated with Fibaro HC3 as QuickApp

We are using Huawei PV installation on top of our house roof. It has web panel and application available to preview every detail about its settings and working conditions. However I would like to integrate PV power production into my Fibaro HC3. So:

First things first: create Northbound API user in web panel. Select all privileges for data acquisition.

Then grab auth token:

curl -X POST "https://eu5.fusionsolar.huawei.com/thirdData/login" \
-H "Content-Type: application/json" \
-d '{
"userName": "USERNAME",
"systemCode": "PASSWORD"
}' -v

In response you will get xsfr-token in headers data. Now using this auth token you need to get installations list (stations):

url -X POST "https://eu5.fusionsolar.huawei.com/thirdData/getStationList" \
  -H "Content-Type: application/json" \
  -H "xsrf-token: TOKEN" \
  -d '{}' -v

Now using your station ID get list of your devices:

curl -X POST "https://eu5.fusionsolar.huawei.com/thirdData/getDevList" \
-H "Content-Type: application/json" \
  -H "xsrf-token: TOKEN" \
  -d '{
"stationCodes": "NE=123456789"
}' -v

To retrieve sort of real time data you need to know your device ID from previous request:

curl -X POST "https://eu5.fusionsolar.huawei.com/thirdData/getDevRealKpi" \
-H "Content-Type: application/json" \
  -H "xsrf-token: TOKEN" \
  -d '{
"devIds": "112233445566778899",
"devTypeId":"1"
}' -v

Now you should be looking for active_power field which is your PV production power (in Watts).

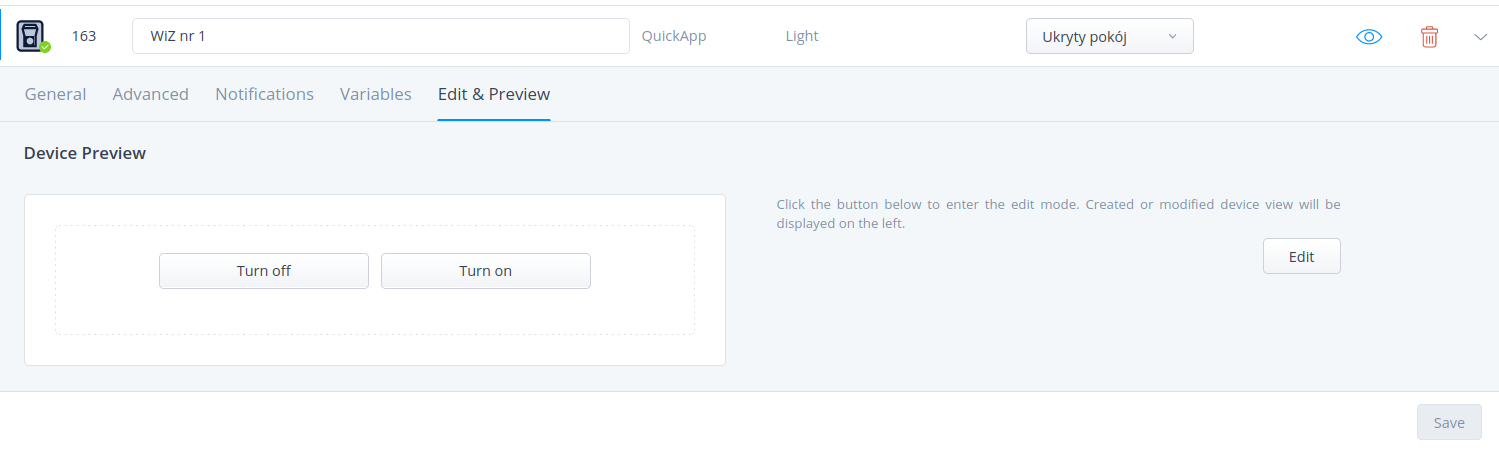
Now lets say you want it in Fibaro. I went with QuickApp (Lua) as follows:

function QuickApp:onInit()
    self:debug("onInit Huawei Falownik")
    self:loop()
end

function QuickApp:loop()
    fibaro.setTimeout(1000*60*5, function() 
        self:debug("Huawei Falownik")
        self:debug("Huawei Falownik: login")
        local token   = ''
        local url     = "https://eu5.fusionsolar.huawei.com/thirdData/login"
        local payload = json.encode({userName="USERNAME",systemCode="PASSWORD"})
        net.HTTPClient():request(url, {
            options={
            data    = payload,
            method  = 'POST',
            headers = {
                ["Content-Type"] = "application/json"
            },
            timeout = tcpTimeout,
            },
            success = function(response) 
                token = response.headers['xsrf-token']
                self:debug("Huawei Falownik: getDevRealKpi")
                local url2 = "https://eu5.fusionsolar.huawei.com/thirdData/getDevRealKpi"
                local payload2 = json.encode({devIds="112233445566778899",devTypeId="1"})
                net.HTTPClient():request(url2, {
                    options={
                    data    = payload2,
                    method  = 'POST',
                    headers = {
                        ["Content-Type"] = "application/json",      
                        ["xsrf-token"]= token
                    },
                    timeout = tcpTimeout,
                    },
                    success = function(response) 
                        print(response.status) 
                        print(response.data) 
                        activepower=json.decode(response.data)['data'][1]['dataItemMap']['active_power']
                        self:updateProperty("value", activepower*1000)
                        self:debug(activepower)
                    end,
                    error = function(message)
                        print("error:", message) 
                    end 
                })
            end,
            error = function(message)
                print("error:", message)
            end 
        })
        self:loop(text)
    end)
end 

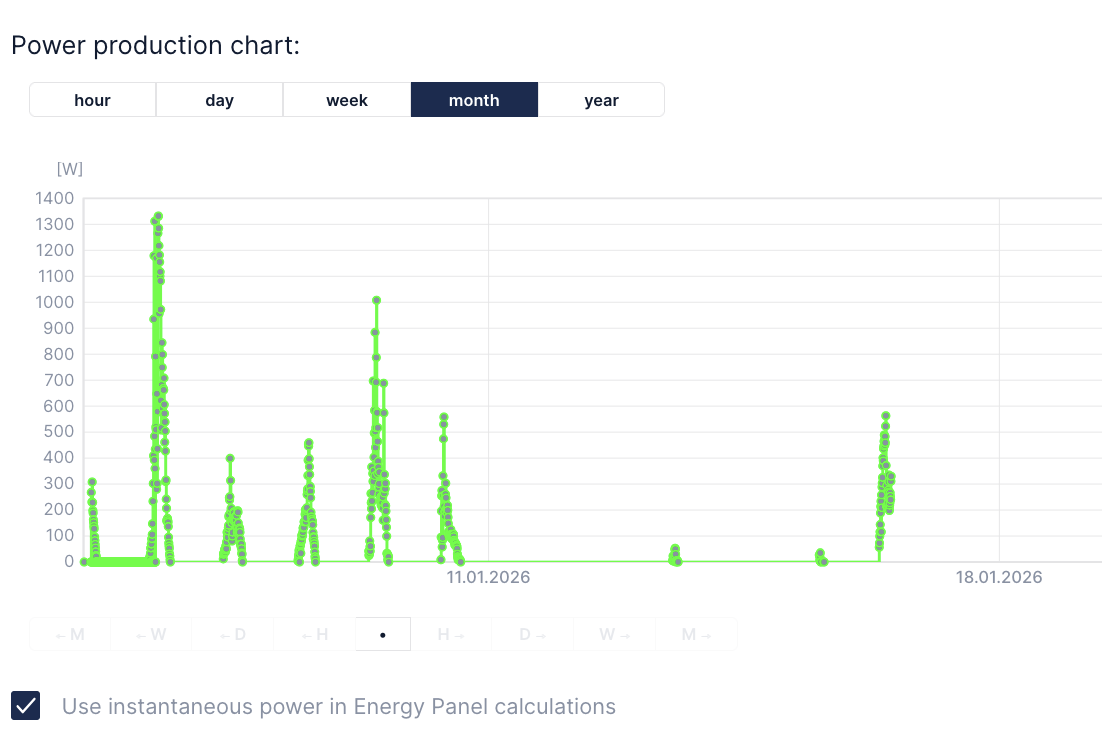
Finally you can setup production meter using this QuickApp. Last thing to remember is traffic limiting on Huawei side sa request data lets say once per 5 minutes or so, otherwise you will get error message instead.

Design and 3D-print wall switch in OpenSCAD

So we decided to try Zigbee wall switches and many of available brands work with Fibaro. But not all of them and not in all configurations. Even if some switch or module works it may only work with Tuya gateway and application and not with Fibaro gateway. So there are some blanks in this concept. We left with double frame with electronic switch and one blank for shutters as there is no compatible switch or module at this time. So I thought: maybe I just 3D-print it…

OpenSCAD code:

cube(size=[4.9, 4.9, 0.2]);

translate([1.9, 1.9, 0.2]) 
   cylinder(h=0.65, r=0.24 ,$fn=100);
translate([3.0, 1.9, 0.2]) 
   cylinder(h=0.65, r=0.24 ,$fn=100);
   
translate([1.9, 3.0, 0.2]) 
   cylinder(h=0.65, r=0.24 ,$fn=100);
translate([3.0, 3.0, 0.2]) 
   cylinder(h=0.65, r=0.24 ,$fn=100);

Few test desigs:

Let’s print them:

And here we go!

Now it looks just fine.

OpenHAB failing to grab RTSP snapshots

If you have OpenHAB on Proxmox or any other virtualization and it sometimes fails to grab RTSP stream and create snapshots, then there is high chance that everything is fine with the camera and network and the problem is within your server hardware. I was investigating this matter a lot and came into this simple conclusion.

If camera does not have built snapshot URL coming from ONVIF (like on EasyCam WiFi with both ONVIF and Tuya) then your OpenHAB will try to make one from RTSP stream with ffmpeg. It starts ffmpeg process which will periodically (in my case every 2 seconds) grab frame and make JPEG out of it. However if you run your OpenHAB on some older hardware like I do (i3-4150 with 2c/4t) there is a chance that 100% utilization spikes on one vCore is too much for it… really. I noticed that with those CPU util spikes come also other connectivity issues and migrating OpenHAB to different server within the same cluster solved almost 100% the problem.

Instead of no image every minute or so now it misses snapshot every few hours. It might do this still because of WiFi signal strength and not because of lack of computational power on server side. There might be also case when camera is buy doing other things. Hikvision cameras notifies you with proper XML error code about this. Maybe there is also the case with EasyCam cameras. Who knows.

Video playback not working on LinkedIn in Opera on Ubuntu 22

On fresh installation of Ubuntu 22, using Opera for video playback can be an issue. So even after installing all things that you may think it could help – it does not work. The solution is to install chromium-ffmpeg and copy its libffmpeg.so library into Opera installation folder.

sudo snap install chromium-ffmpeg
cd /snap/chromium-ffmpeg/xx/chromium-ffmpeg-yyyyyy/chromium-ffmpeg
sudo cp libffmpeg.so /usr/lib/x86_64-linux-gnu/opera/libffmpeg.so

Be aware that snap installation path differs in few places so check your installation. After copying ffmpeg library, just restart Opera and the video, previously not loading in LinkedIn, will work.

Making Satel Opal Plus motion sensor wireless with Fibaro Smart Implant

It is possible to make wire based motion sensor from Satel, wireles using Zwave network. Satel Opal, Opal Plus and Opal Pro have similar case which can hold additional module of Fibaro Smart Implant. On the picture below is on the bottom right side on the case, just below the sensor module. It fits quite well here.

Both sensor and implant are powered by 12V DC, so you need to have only 2 wires coming to the sensor intead of 3 or more. It is especially important if you already made in-soil wiring and would not like to change it that much.

So, Fibaro Smart Implant has 2 binary switch-like inputs as well as 2 resistive outputs which can be disconnected if not needed. On the picture above you see these outputs unused. Import FSI into your system of a choice. Mine is Fibaro HC3. But be aware that there is one quirk going on here. After adding it you will not see binary inputs as separate devices and moreover you need to manually put an association from those inputs into controller. It is counter-intuitive.

There is binary switch on the list, but no binary input:

Then, once you have this configured at this time you will not be able to use it as a security device because it is not such a device. It is just a binary input and switch as name states. So Fibaro HC3 will not include it in alarm zone. You can change this by using QuickApp with motion sensor type set. As binary input changes binary switch then you can use this parameter and rewrite state from one device into another. As simple as it is:

function QuickApp:onInit()
    self:debug("onInit")
    self:loop()
end

function QuickApp:loop()
    fibaro.setTimeout(500, function() 
        self:debug(hub.getValue(111, "state"))
        self:updateProperty("value", hub.getValue(111, "state"))
        if hub.getValue(111, "state") == true then
          fibaro.setTimeout(500, function() 
            hub.sleep(5000)
          end)
        end
        self:loop(text)
    end)
end 

Beaware that this granularity is enough which has been tested. Satel Opal motion sensors are powerful so no need to increase frequency. By default this motion sensor gives alarm for 2 seconds and here I have extended it to 5 seconds just for testing sake. In case of alarm zone it does not matter how long it reports as when it reports is done.

Fibaro Home Center 3 vs OpenHAB

Recently we’ve ordered Fibaro’s HC3 as a replacement for OpenHAB. First because it has integration with Satel alarm system and second that it has native Zigbee support next to default Zwave. OpenHAB also has support for Satel and by using external adapter you can connect Zigbee devices too. So why change OpenHAB to HC3 you can ask. Because it is a commercial product with a support and it feels like a product even if OH has similar or greater capabilites in few areas.

Any cons? Sure thery are.

Although it supports Nice devices like gates and garage doors, it works only with selection of devices, not all of them, not in every possible combination. Although it supports Zigbee devices, it is still in beta state. So do not expect that every cheap chinese module will work and from my experience like 50% will not work. HC3 sees them, adds them but they stay in unconfigured mode with no use. So it is better to order online to have a chance to send it back once it does not work. Overall integrations count is greater in OH than in HC3, especially when talking about official integrations and not third party ones.

So what about pros?

I better like to write Lua code in HC3 instead of writing DSL code in OpenHAB. Not a big difference, but QuickApp concept in HC3 seems to be more like getting things standarized. Generally speaking HC3 whole concept is more standarized with things set already by deafult, like alarm zones or garden watering. No such thing in OH by default. Lastly, HC3 in my private opinion has fewer UI quirks than OH.

Grand limitations and missing integrations

HC3 is not intended to be a video surveillance recording thing. I still have to use OpenHAB to get all variaty of IP cameras to offer still picture snapshots and MJPEG “streams”. RTSP streamig is said that will work only in Yubii (HC3 native mobile application) and only in local network. Well… it does not work for me that way neither.

There is no Huawei solar panel integration that will just work. There is no SmartThings integration. And finally there is no WiZ lights integration. Fortunately I managed to overcome these two limitations but integrating it by myself:

No conclusion yet. The battle is still on.

Fixing Ubuntu 22 camera recording

I tried to record video on my Dell G15 laptop using built-in camera. Unfortunately, by default it does not work. I tried Cheese and Webcamoid using several different settings. Cheese did not work with both built-in and external camera. Webcamoid worked with external camera only. Finally I decided to try OBS-STUDIO and still built-in camera was crashing this piece of software also.

To fix this problem you could try to disable AppArmor:

sudo systemctl stop apparmor.service
sudo systemctl disable apparmor.service

If it is the case, then you can try to find which AppArmor profile is responsible for blocking camera recording. For me, it was the case. Now I can record using built-in camera.

Turn on/off Samsung SmartThings A/C from Fibaro HC3

In order to integrate your SmartThings devices into Fibaro HC3 you need to create access token and review API documention which can be found here:

https://developer.smartthings.com/docs/api/public#tag/Devices/operation/getDevices

Then, to send on or off command to your device, grab its UUID, create QuickApp with the following code:

function QuickApp:turnOn()
    self:debug("binary switch turned on")
    self:updateProperty("value", true)
    local url = "https://api.smartthings.com/v1/devices/a-b-c-d/commands"
    local payload  = '{"commands": [{"component": "main","capability":"switch","command":"on"}]}'
    net.HTTPClient():request(url, {
        options = {
            data = payload,
            method = 'POST',
            headers = {
                ["Authorization"] = "Bearer abcdef"
            },
            timeout = tcpTimeout,
        },
        success = function(response)  
                print(response.status)
                print(response.data)
        end,
        error = function(message)
                print("error:", message)
        end
    })
end

Connecting WiZ LED lights to Fibaro HC3

In popular DIY markets you can buy Philips WiZ LED light bulbs. They are affordable choice over Hue lights. WiZ lights operate thru WiFi connection and can be integrated easily within OpenHAB system as a wizlighting binding coming from marketplace. However it is not a case in Fibaro HC3 where there is no direct integration. However… you can create your own QuickApp application and insert custom Lua code to communicate over UDP with those LED bulbs.

To get status of a bulb (a.b.c.d is a IPv4 address):

echo '{"method":"getPilot","params":{}}' | nc -u -w 1 a.b.c.d 38899

To turn on the light:

{"id":1,"method":"setState","params":{"state":true}}

To turn off the light:

{"id":1,"method":"setState","params":{"state":false}}

And here we have QuickApp lua code:

function QuickApp:turnOn()
    self:debug("binary switch turned on")
    self:updateProperty("value", true)

    local data = '{ "id":1,"method":"setState","params":{"state":true} }'
    local socket = net.UDPSocket()
    socket:sendTo(data, "a.b.c.d", 38899, {
        success = function()
            self:debug(data)
        end, 
        error = function(error)
            print('Error:', error)
        end    
    })
end

function QuickApp:turnOff()
    self:debug("binary switch turned off")
    self:updateProperty("value", false)   

    local data = '{ "id":1,"method":"setState","params":{"state":false} }'
    local socket = net.UDPSocket()
    socket:sendTo(data, "a.b.c.d", 38899, {
        success = function()
            self:debug(data)
        end, 
        error = function(error)
            print('Error:', error)
        end    
    }) 
end

function QuickApp:onInit()
    self:debug("onInit")
end

To create QuickApp application, go to Settings – Devices – Add – Other – QuickApp.

Further reading https://aleksandr.rogozin.us/blog/2021/8/13/hacking-philips-wiz-lights-via-command-line