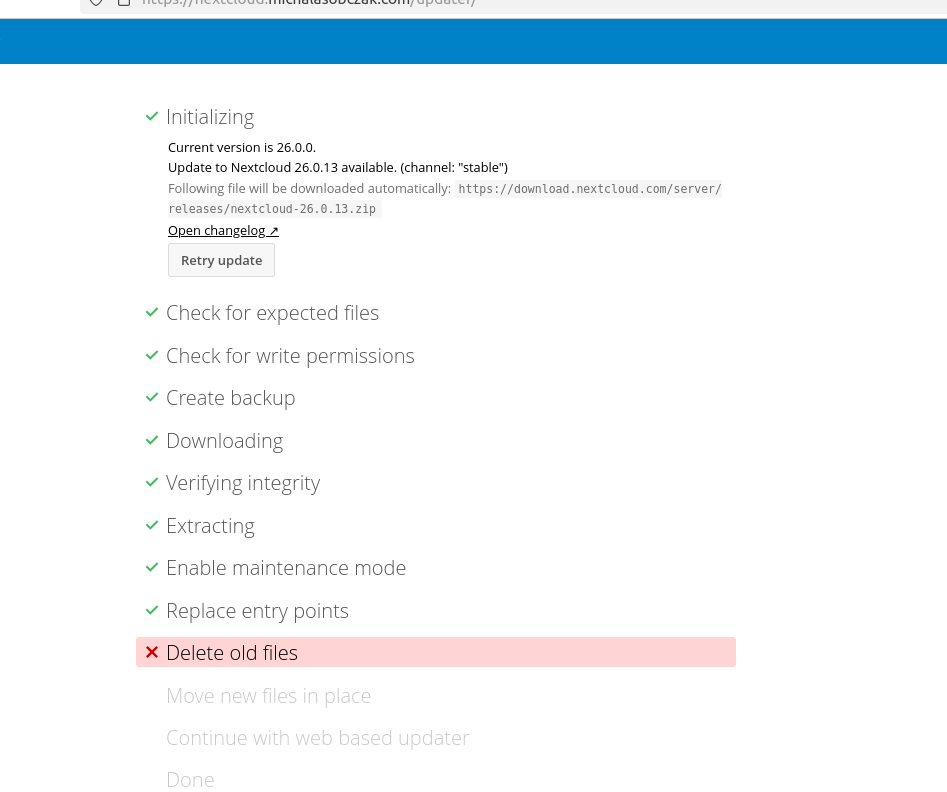
I use NextCloud as alternative to Google Photos. My smartphone sends pictures over OpenVPN to my NextCloud instance. However for over a year Android application has been showing notification that server version is outdated, and from time to time automatic upload do not work. So I decided that it is the time to do an upgrade. It did not work well:
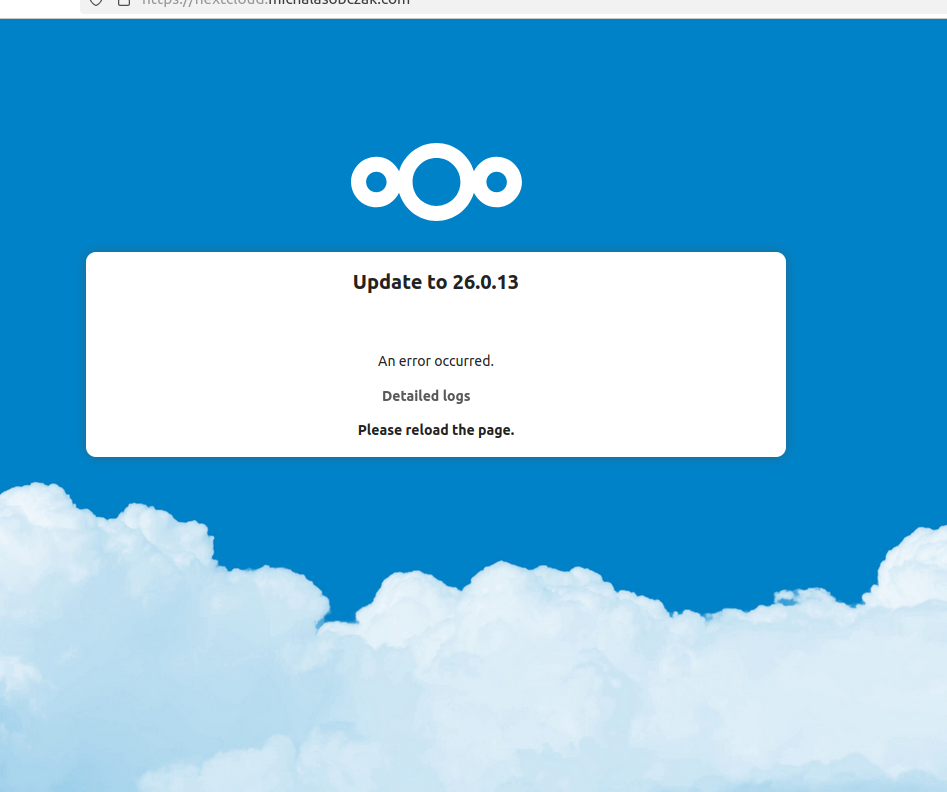
I tried to run upgrade using UI. It got stuck in various places, and finally I got this:
But there is much simpler option. Install fresh copy of NextCloud. I prefer using VM ISO (https://www.turnkeylinux.org/nextcloud) instead of LXC containers. I feel that sometimes LXC container draws too much constrains and limitations, such as quircky backups, kernel features etc. Once you have clean install copy data from original location to /var/www/nextcloud-data/ and run the following command:
sudo -u www-data php occ files:scan --all
Be sure to install sudo first (apt install sudo). That’s all. I use only NextCloud as automatic photos and videos upload co my case is quite simple. If you use various different integrations, calendars, mail etc, then your migration scenario is much more complicated.
Please note that I tried fixing all these upgrade problems with permissions, missing files etc, but after and hour it got permanently stuck, so I decided to go with easy way.
At Indatify we use PostgreSQL for most of the time when dealing with data. We tried to use Cassandra, but for now it is too much of a constraint in such dynamic data environment. We put it on shelf. However, for textual data we choose Elasticsearch, because we know it and it provides full text search out of the box. Later, we will come back to Cassandra, but with more specified use case, as it requires precise data model to be predefined by query and not by structure.
So, to install Elasticsearch (if running without sudo, then run from root):
We are good to go. Remember to allocate at least 8GB of memory, 4GB is too little. More you have memory, more Elastic will put into it and run more quickly, instead of loading data directly from drives.
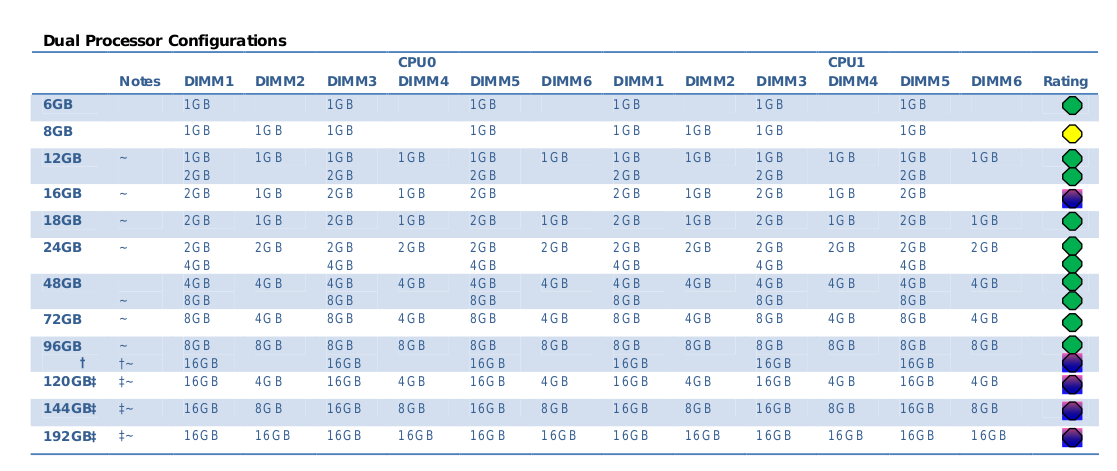
In our lab we have 2 x HP z800 workstations. It is somehow ridiculous piece of hardware in terms of today standards. It’s got over 1 kW power supply, dual CPU motherboard and 12 memory slots. It is loud, draws loads of power and it’s got comparable gen 1 Intel CPUs as well as DDR3 – slow – memory. However it costs close to nothing and it is suitable for most small and mid applications.
Official documentation says that the maximum memory capacity is 192GB of DDR3, which is 12 x 16 GB sticks working at 800 MHz. If we are interested in higher speeds, then we go to 96GB at 1067 MHz using 16GB sticks or 1333 MHz at all 8GB sticks. Currently (2025) DDR5 memory works up to 8800 MT/s, so it is roughly 10 times faster, however with higher latencies. Much higher clock speeds compensates higher latencies.
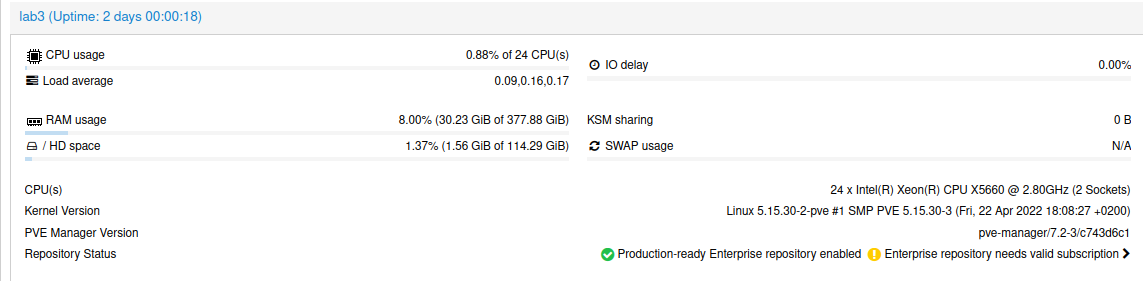
Even though having 384GB of DDR3 is a lot for regular computing like application servers, mail servers, file storage, surveillance etc. At our lab we are using this server for data mining which includes Docker containers as well as database servers (various types).
However, we can put more memory than 192GB. We put as twice as much. Actually, installing Intel Xeon x5660 we would be able to handle as much as 288GB per CPU giving 576 GB of RAM in total. But we have only 12 memory slots and maximum capacity of memory module is 32GB. If we would have 18 memory slots then we would be able to put 576 GB, but with 12 memory slots we are able to place “only” 384GB.
HP z800 motherboard and Xeon CPUs take both unbuffered and registered DIMMs but not at the same time. So be sure to buy only one type, which I think it should be either 8500R or 10600R. Is is not worth to buy faster DIMMS as they still will be working at 800MT/s.
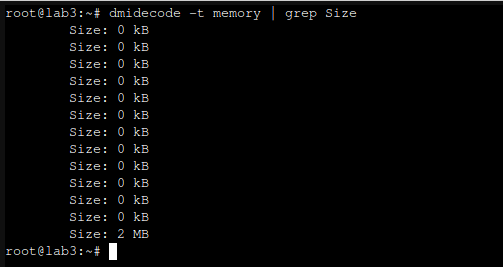
One important quirk regarding 32GB DDR3 memory sticks is that they are not recognized properly but dmidecode:
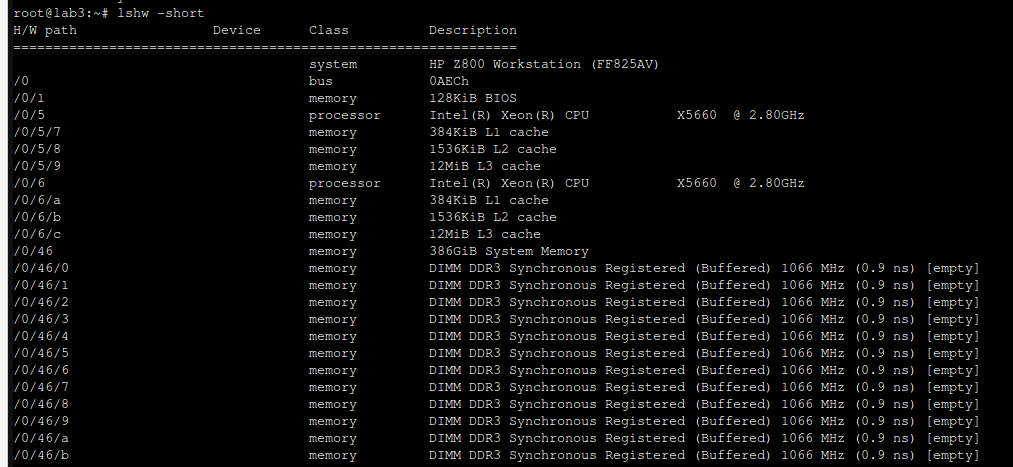
Same thing with lshw:
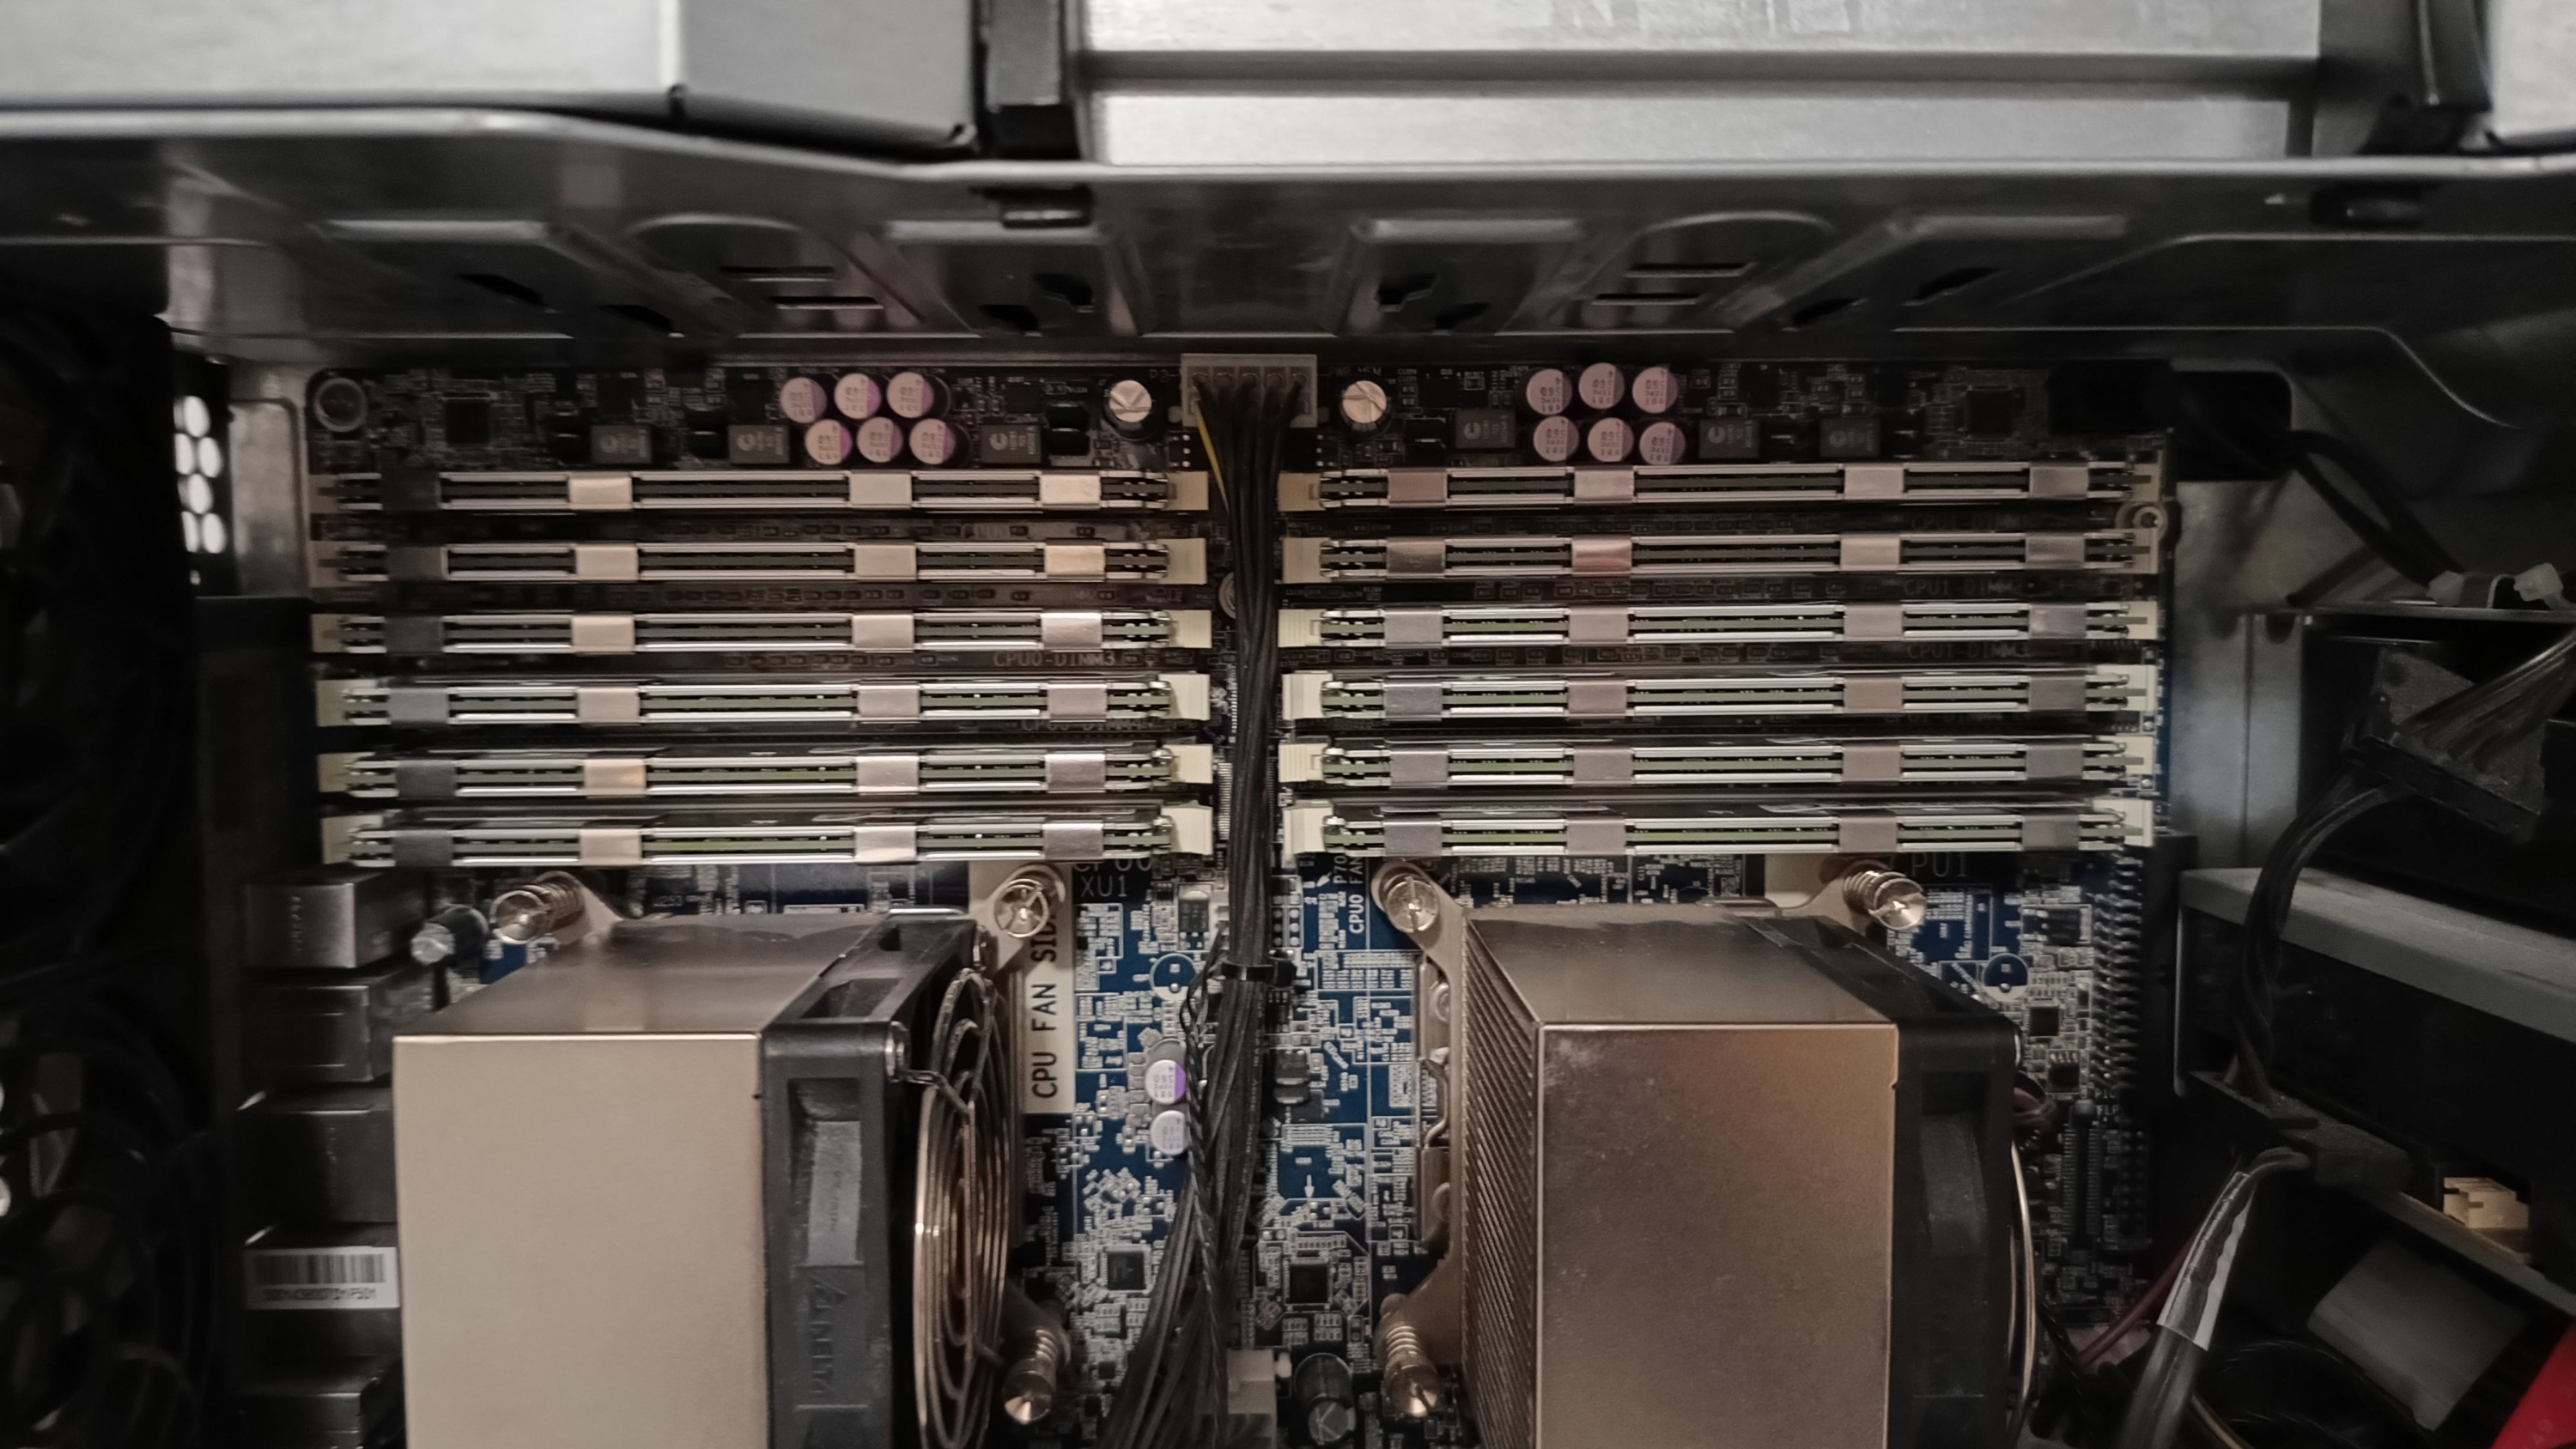
To access 12 x memory slots you need to remove double fan case. Moreover each memory module contains metal plate for heat dissipation. It can get really hot if put under heavy load.
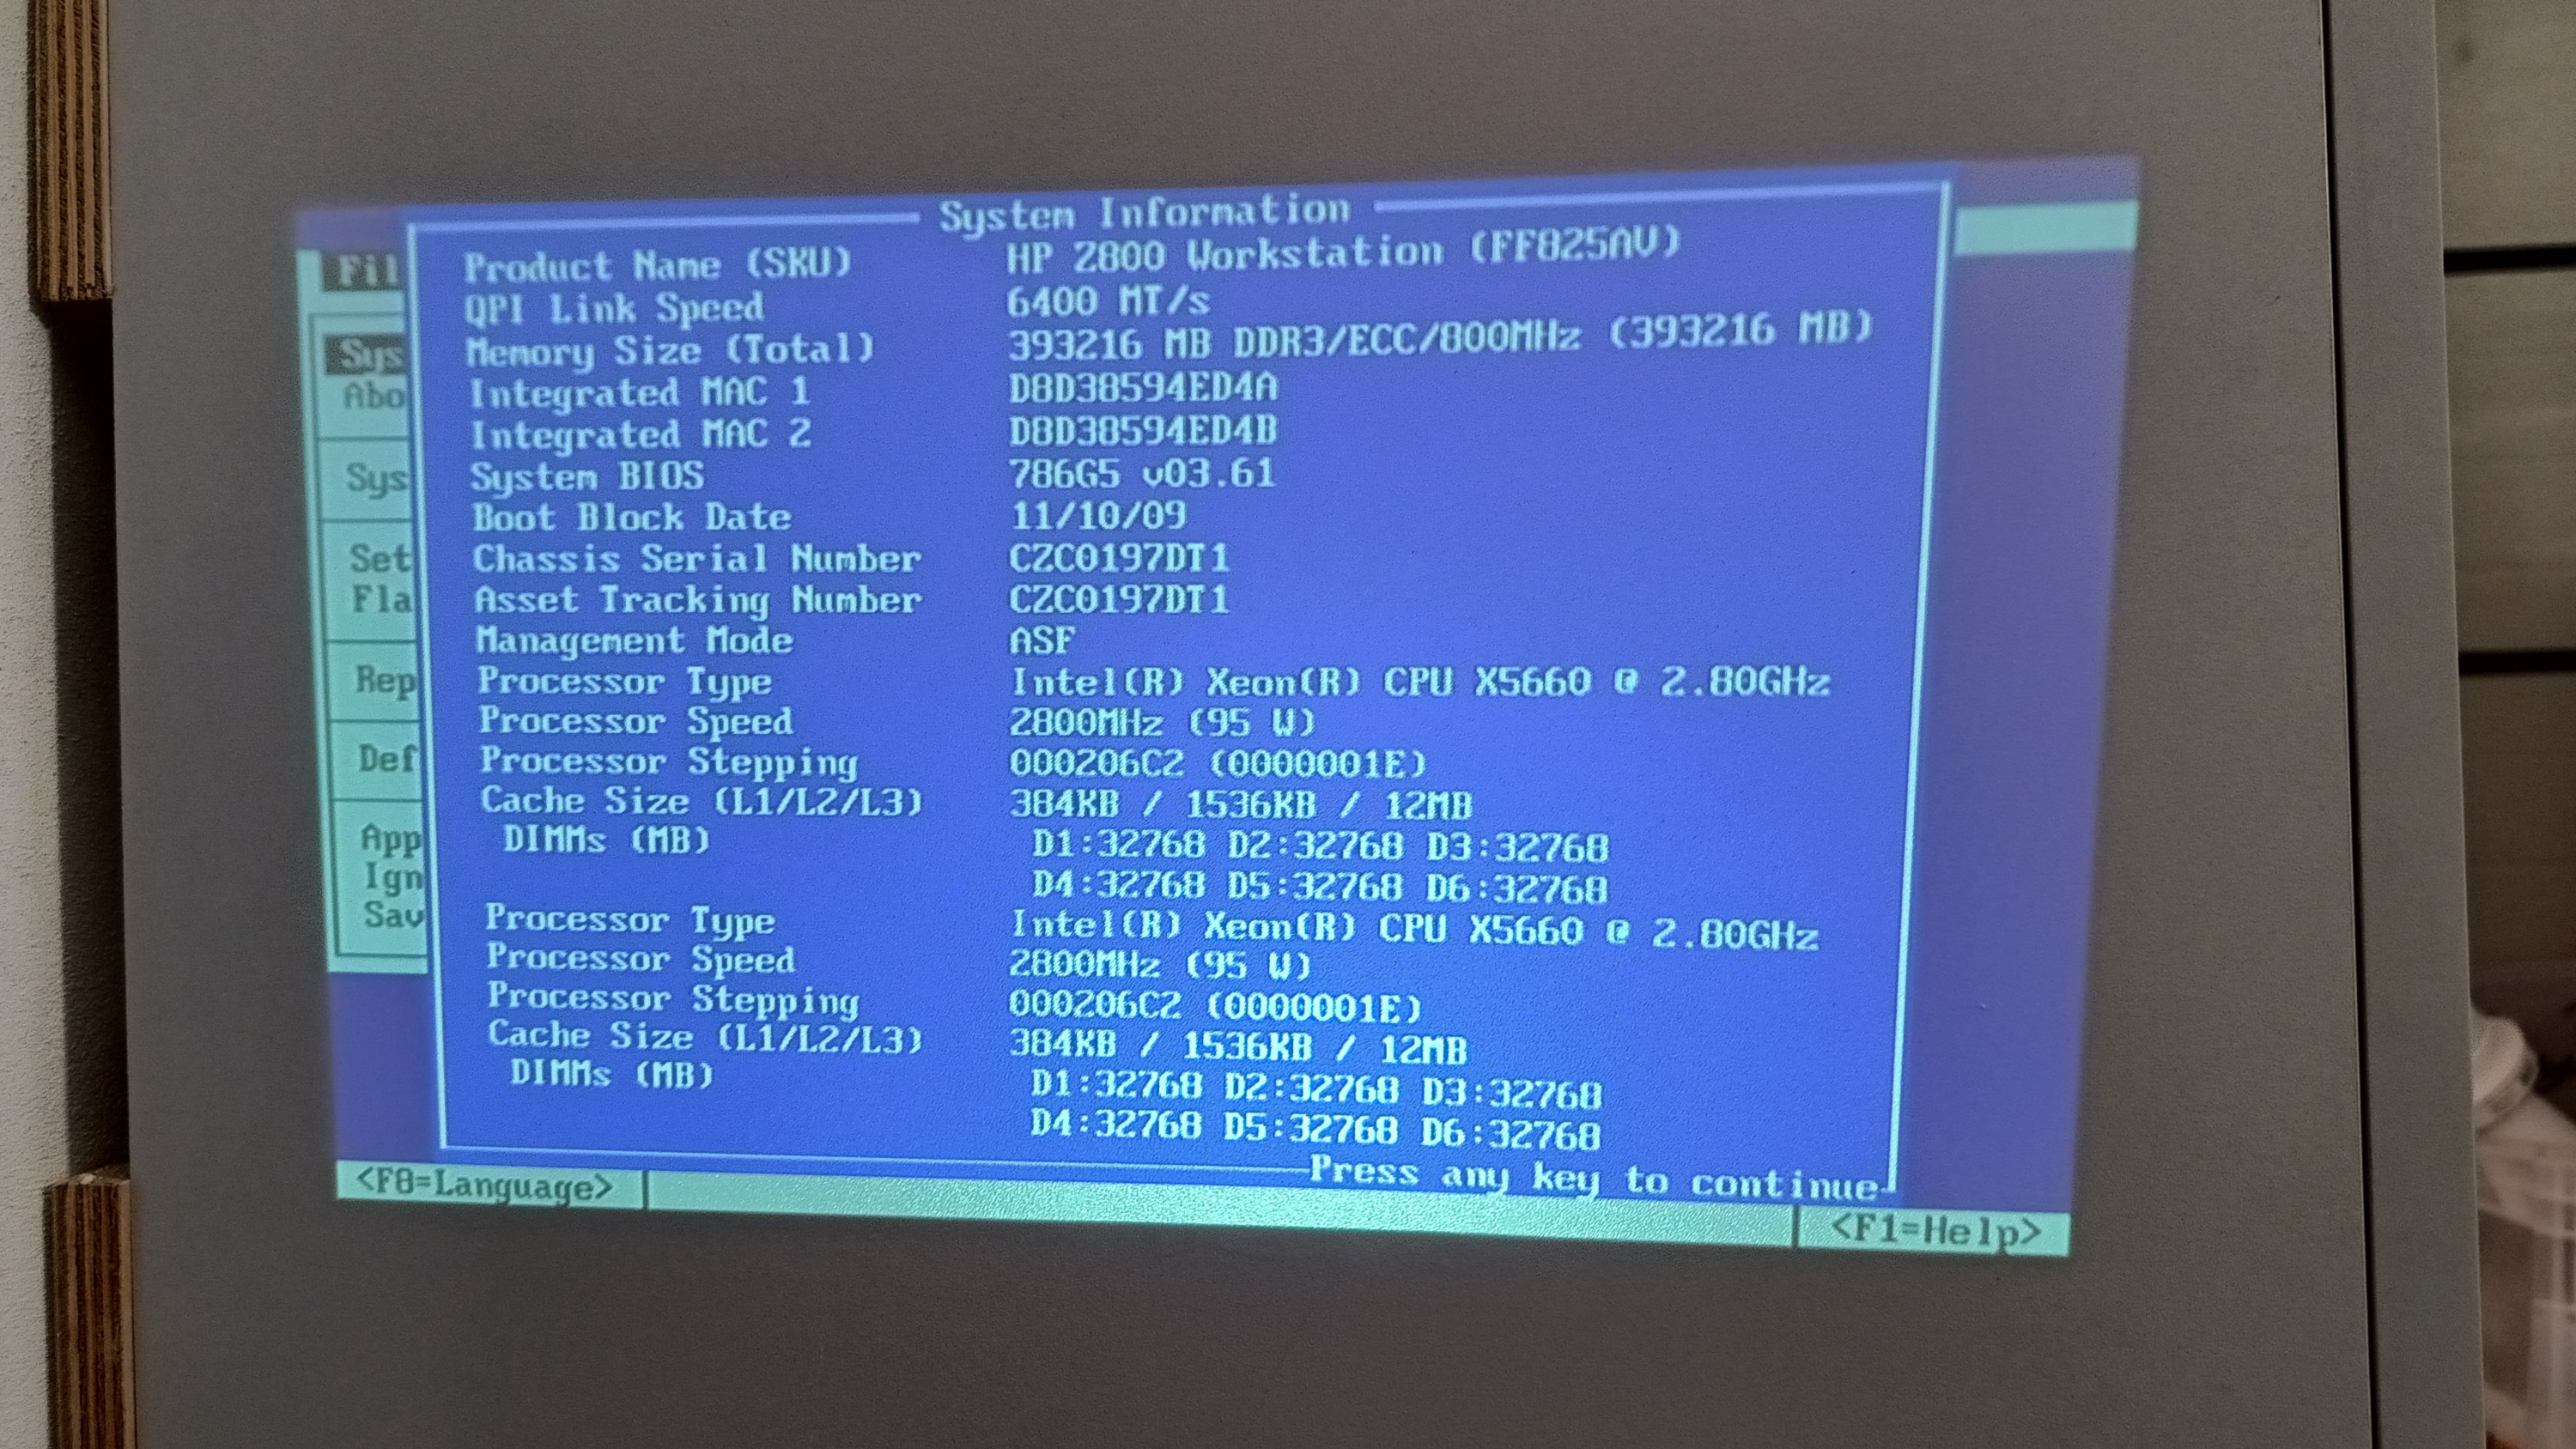
BIOS says that everything is fine. All DIMMS are recongnized. Each Xeon x5660 and x5690 has 3 memory channels so be sure to place same type/speed/latency memory module in 2 consecutive memory slots. As per documentation there is preffered way to populate memory sticks in case of placing less than maximum number of them, so be sure to either place 12x same sticks or follow documentation to have the most close confiugration.
To try installing 384GB of RAM I was inspired by https://www.youtube.com/watch?v=AoS0kX82vs4 – it worked out! Finall note. Regular market price of 32GB DDR3 sticks varies between 50 and 300 PLN (10 – 70 EUR). However I was able to find 24 sticks (as I we have 2 such servers) for as low as 7 EUR per stick. Few years back it would be cost of 1600 EUR, today it was 160 EUR.
CREATE ROLE replica WITH REPLICATION PASSWORD 'xxxYYYzzz' LOGIN;
Then add physical replication slot, in order to stay in sync with WAL. Without it, if applying logs on replica will be too slow, main server could drop logs which replica did not consume yet, leading to broken replication:
Managing self-hosted Sentry is pretty straightforward. However due to high number of containers which Sentry is comprised of, there is high chance that we can encounter some kind of issues due to obvious nature of software development products which consists by definition some flaws.
So this time Sentry is getting traffic from embedded agents but payload is not complete. It lacks processing of transactions. So first we need to dive into Kafka groups. With the following, we can inspect the state of topics:
docker compose run --rm kafka kafka-consumer-groups --bootstrap-server kafka:9092 --all-groups --describe
We can learn that something is out of date or nothing processes some topics. So using docker compose exec kafka bash we can start shell in kafka container and then delete failed topics:
There might be lag, wrong offset or any other kind of issue with consumer of beforementioned topics. Sentry software will recreate those topics and your performance metric will again start to show up in Sentry UI.
As for year 2025 there is no more updates for CentOS 7.9.2009. Moreover you need to adjust repository file as network locations changed a little bit. So edit /etc/yum.repos.d/CentOS-Base.repo as follows:
I thought of adding another Proxmox node to the cluster. Instead of having PBS on separate physical box I wanted to have it virtualized, same as on any other environment I setup. So I installed fresh copy of the same Proxmox VE version and tried to join the cluster. And then this message came:
Connection error 500: RPCEnvironment init request failed: Unable to load access control list: Connection refused
And plenty other regarding hostname, SSH keys, quorum etc. Finally Proxmox UI went broke as I was unable to sign in. Restarting cluster services ended with some meaningless information. So I was a little bit worried about the situation. Of cource I got backup of all things running on that box, but it would be annoying to bring it back from backup.
Solution, or rather monkey-patch for this is to shutdown this new node. On any other working node (preferably on leader) execute:
umount -l /etc/pve
systemctl restart pve-cluster
This command unomunts and remounts FUSE filesystem and then restarts PVE cluster service. What was the root cause of this? Actually I do not know for sure, but I suspect either networking or filesystem issue causing some discrepancies on distributed configuration. I even added all node domains to local pfSense resolved to be sure that it is not DNS issue. Another options is that 2 out of 4 nodes have additional network interface with bridge. Different filesystems (ZFS vs XFS) might be a problem, but I do not think so anymore, as 2 nodes already got ZFS and adding them to cluster was without any problems in the past.
I decided not to restart any nodes or separate them as it might cause permanent obstruction. So it stays as a mistery, with monkey-patch to have it running once again.
Lets say you want to pass traffic from your local container/VM via some external pfSense box. This way there is no need to setup VPN on each container you want to include in the setup. There is OpenVPN option to pass all traffic thru the tunnel, but it breaks several other things both locally and on remote pfSense box.
So there is this network configuration:
Local virtualizated pfSense purpose is to pass-thru traffic. So it has only one interface which is WAN. No LAN interface over there. Addressing can be the same as on local physical pfSense.
You need to first setup OpenVPN client (CA, certificate, user and connection) and then create interface assignment upon this connection. It will called something like ovpncX. Remember that OpenVPN is restricted name so you need to call your interface with other name.
To differentiate traffic from LXC/VM create pass rule with source set at this LXC/VM and in advanced settings point OpenVPN client gateway. Remember to put this rule before any other catch-all rules. Once you got OpenVPN client and pass rule, go to NAT outbound and set manual outbound NAT to enter rule manually. Use LXC/VM address as source and select OpenVPN client interface.
To differentiate traffic from other LXC/VM not to pass traffic thru OpenVPN client, add another NAT outbound (no need to set pass rule here as we use default gateway) and set WAN interface and other LXC/VM address as source.
Now you would have one LXC/VM passing traffic thru remote OpenVPN (via OpenVPN client) and the other LXC/VM passiing traffic regularly thru WAN into secondary physical pfSense and then into the internet. This way you can manage how to expose your traffic to public internet.
If you have OpenHAB on Proxmox or any other virtualization and it sometimes fails to grab RTSP stream and create snapshots, then there is high chance that everything is fine with the camera and network and the problem is within your server hardware. I was investigating this matter a lot and came into this simple conclusion.
If camera does not have built snapshot URL coming from ONVIF (like on EasyCam WiFi with both ONVIF and Tuya) then your OpenHAB will try to make one from RTSP stream with ffmpeg. It starts ffmpeg process which will periodically (in my case every 2 seconds) grab frame and make JPEG out of it. However if you run your OpenHAB on some older hardware like I do (i3-4150 with 2c/4t) there is a chance that 100% utilization spikes on one vCore is too much for it… really. I noticed that with those CPU util spikes come also other connectivity issues and migrating OpenHAB to different server within the same cluster solved almost 100% the problem.
Instead of no image every minute or so now it misses snapshot every few hours. It might do this still because of WiFi signal strength and not because of lack of computational power on server side. There might be also case when camera is buy doing other things. Hikvision cameras notifies you with proper XML error code about this. Maybe there is also the case with EasyCam cameras. Who knows.